- Home
- Taxi App Clone
- GoJek Clone
- Overview Get to Know Our XJekPlus App
- Apps Screens & Flow Understand the Process of Booking A Service
- More Info Learn about more services & features
- Pricing See the Detail Cost of Building Gojek Clone App
- Website Visuals Dive into the Web Demo of Multi-Service Business
- Enquire Now Know more details about the Mult-Service App
- Demo Test the Apps in the Present Time
- Admin Visuals Peak into the Administrative Panel
Gojek Clone - XJekPlus App 2026 EditionTime to Step into Multiple Markets with Our Advanced Gojek Clone App Online Multi-Service Platform!
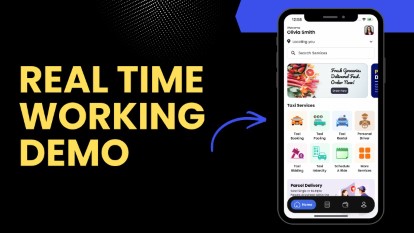
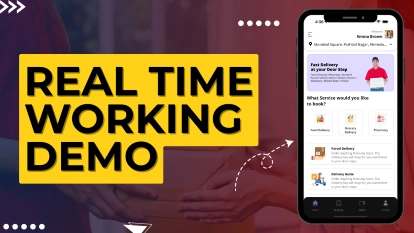
How It Work?Understand the full process of booking a ride, services, or hiring experts through the Gojek Clone App. Have a look at the real-time booking video and give your utmost comfort with 101+ services.
- Grab Clone
- Grab Clone Overview Get to Know About Grab Clone
- Demo Try the Applications in Realtime
- Apps Screens & Flow See Detail Service Booking Flow
- Pricing Detail Cost of Building the App
- More Info Get Additional Details like Website, Admin Panel & KIOSK App Visuals
- Enquire Now Get to know more about the Super App
Grab CloneBuild your Super Services App with our newest Grab Clone App!
How it works?Get a deep understanding of the App features and functions.
- Super Service App
- SuperX SP Overview Get a Brief of the SuperX SP App
- Demo Try the SuperX SP App in Real-Time
- App Screens & Flow Have a Look at the Service Booking Flow of the App
- Website & Admin Panel Visuals Look at the Website & Admin Panel Visual
- Pricing See the Cost of Building the Application
- Enquire Now (Super Service App) Reach out to us for more details on the App
SUPERX SPStart Making Money by Building Super Service App with over 72 Services
How It Works?Grab a complete understanding of the SuperX SP App and its features and functionality in this Real-Time Video.
- Delivery Apps
- Food Delivery Know all About Food Delivery Apps
- Grocery Delivery Brief About Grocery Delivery Apps
- DeliveryKing - Master App Brief Information on Our DeliveryKing App
- Parcel Delivery Get to Know of Parcel Delivery Apps
- Taxi and Delivery App Get to Know All About Our Taxi And Delivery Combined App
- Pharmacy Delivery Basic Information About Pharmacy Delivery Apps
- More Delivery Apps See More Other Delivery Apps
- Enquire Now More details about the Delivery Apps
- More Products
- Uber for Medical Services Gain Profit by Building Medical Services App
- Uber for Car Wash & Care Earn Profits by Launching your Car Wash Services App
- Carpooling App Earn Profit with Building Carpooling App
-
 Uber for Towing & Other Services
Earn Profit by Towing and Other Service App
Uber for Towing & Other Services
Earn Profit by Towing and Other Service App
- Uber for Beauty Services Expand Salon Services Online with Beauty Service Apps
- Uber for Massage Services Make Money with Massage Services Apps
- Uber for House Cleaning Get to Know All About House Cleaning App
- Security Guard App Your Users can Book Security Guards
- Employee & Family Tracking App Get Information on Tracking App- Employees & Family Members
- Buy, Sell, and Rent - Cars, Real Estate, Items Make a Profit by Getting Hands on Buy, Sell, Rent App
- Uber for Other Individual Services Earn Money by Offering On-Demand Services
- More Products and Clones Get to Know About Other Products and Clone for Every Demand
- Our Clients
- About Us
- About us Empowering businesses with smart digital solutions.
- Events & Life @ V3Cube A culture built on growth and collaboration.
- INFRASTRUCTURE The strong tech backbone behind our solutions.
- Careers Build your career with a growth-driven team.
- Corporate Social Responsibility Giving back to society for a sustainable future.
- White Labeled Apps Launch branded apps, ready for your market.
-
 Blog
Stay informed with latest industry insights, trends, and important updates.
Blog
Stay informed with latest industry insights, trends, and important updates.
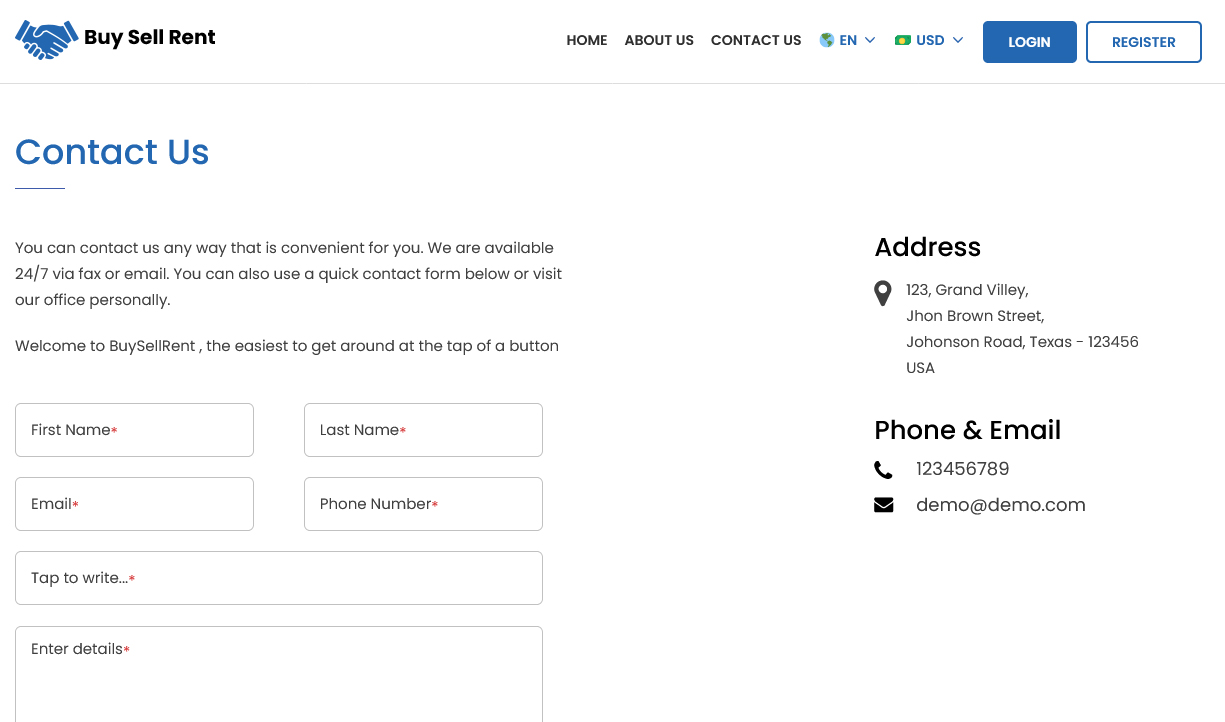
- Contact Us Reach out for support, queries, or business needs.
Our CompanyYour One Stop Solution for Your App Development
 Enquire now
More ProductsSee-through Our More Products Delivering the App for Every Need
-

-

-

-

-

-

-

-

-

-

-

-

-

-

-

-

-

-

-


-

-

-

-

-

-

-

-

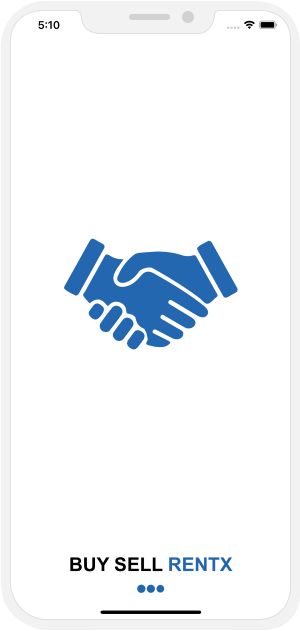
- User Application's Splash Screen with App's Logo will be displayed for 2-3 Seconds. Your logo with your App name will show here.
- User can see the information related to the Application on the Screen.
- With this Screen, the User can flexibly choose the Language as well as currency of their choice. They can proceed for login or register through this Screen.
-

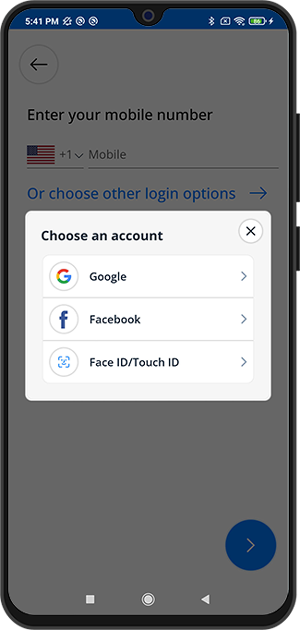
The User can login into the App by using their Mobile number.
-

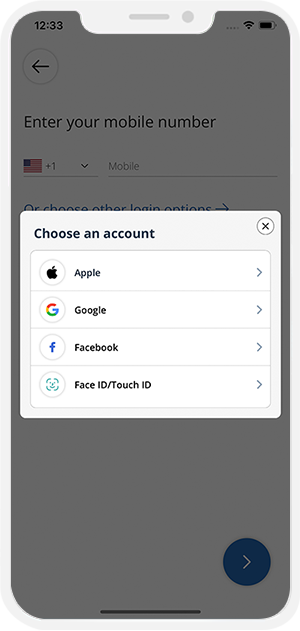
The User can also login into the App by using Face ID / Touch ID / Social Media Accounts (Google & Facebook) / Apple Account.
-

After entering the Phone number, user can either enter the OTP or the alphanumeric password. App Owner will decide and set in Admin Panel Settings of what he wants in his App: OTP or Password. OTP can be send either using Twilio or Firebase method.
-

User can enter alphanumeric Password. (If this is set by the Admin).
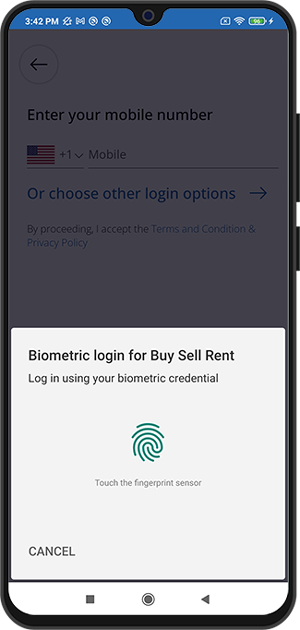
- To activate Smart Login (Finger Print / Face Id), User first need to login/sign up either by mobile number or social media.
- After login, user can enable smart login option from his profile section of application.
- After enabling this option, User will see the Smart Login option in the login screen on his Device. Next time Users will be able to login using Touch ID / Face ID.
- Android Users can login using the Touch ID from their Mobile Phone.
- User will be ask to put finger on sensor.
- Its hassle free and help you to login using Touch Id.
- Note: To activate Smart Login (Finger Print or Face ID), User first need to login/sign up either by Mobile Number or Social Media.
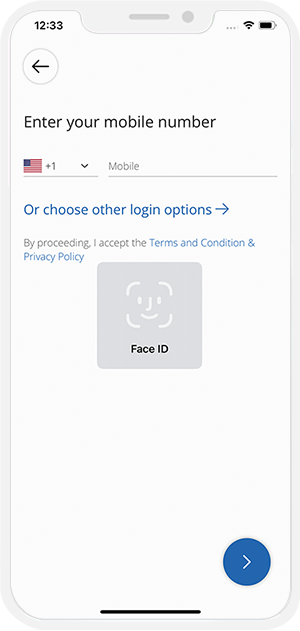
- In case of iPhone device, User will be ask for Face Detection.
- After successful authorization, User will be taken to Main/Landing screen.
- Note: To activate Smart Login ( Finger Print or Face ID ), User first need to login/sign up either by Mobile Number or Social Media.
-

Users can login to the App using Mobile number & Social Media credentials (Facebook or Gmail). There will be multiple steps for registarion.
-

After entering the Phone number, User will be asked to enter the OTP or password (as set by the App owner).
-

User can enter his full name in order to register on the App.
-

User can enter his email address and proceeed ahead. Once User is successfully registered on the App, he can login and use the Apps.
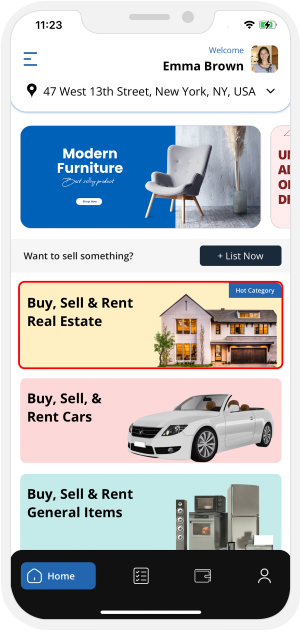
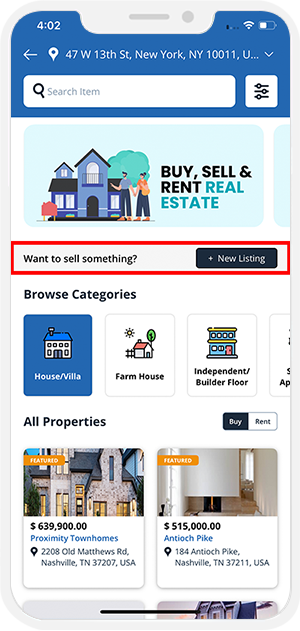
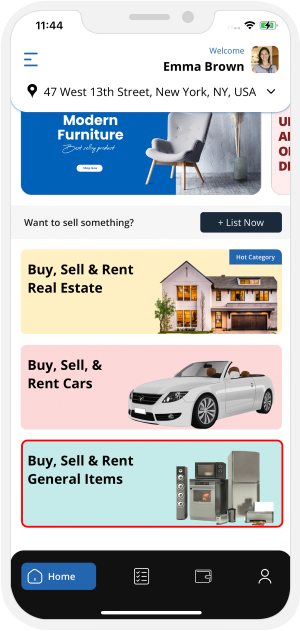
- A quick & user friendly way to access all features of the User's App. Wallet Balance will show on top along with Settings icon.
- Users can Buy & Sell Real Estate Properties like Apartments, Homes/Villas, Warehouses, Industrial Sheds, etc. on the App.
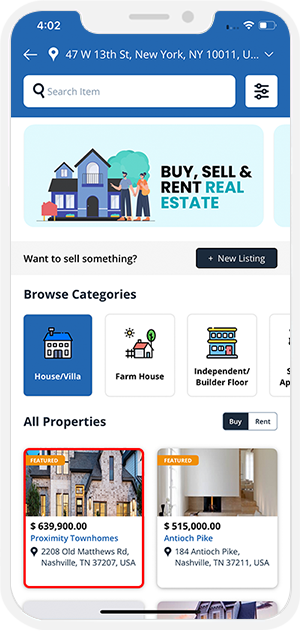
- Users who want to buy / rent a Property can tap on the “Buy, Sell & Rent Real Estate” section. As soon as they tap here, an entire page with Nearby Properties for rent / sell will be displayed.
- User can view list of all the available nearby Properties.
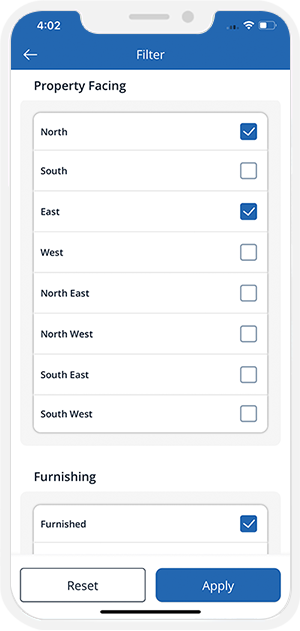
- The User can search Property by name OR can filter it by “Property Type”, “Property Facing”, “Furnishing”, “Floor”, etc.
- The User need to select required filters and then tap on “APPLY” button at bottom.
- It will show the Properties based on the filter selected.
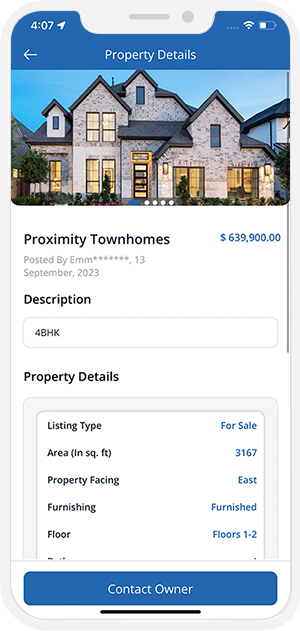
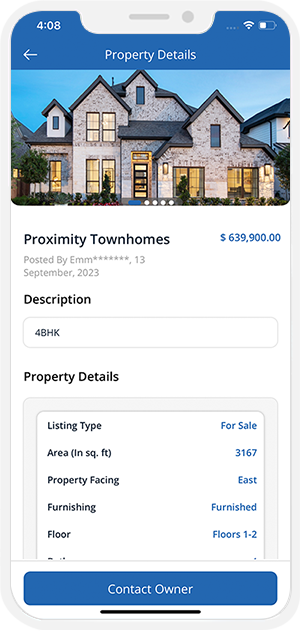
- If User like a Property, they can tap on it and see its Details.
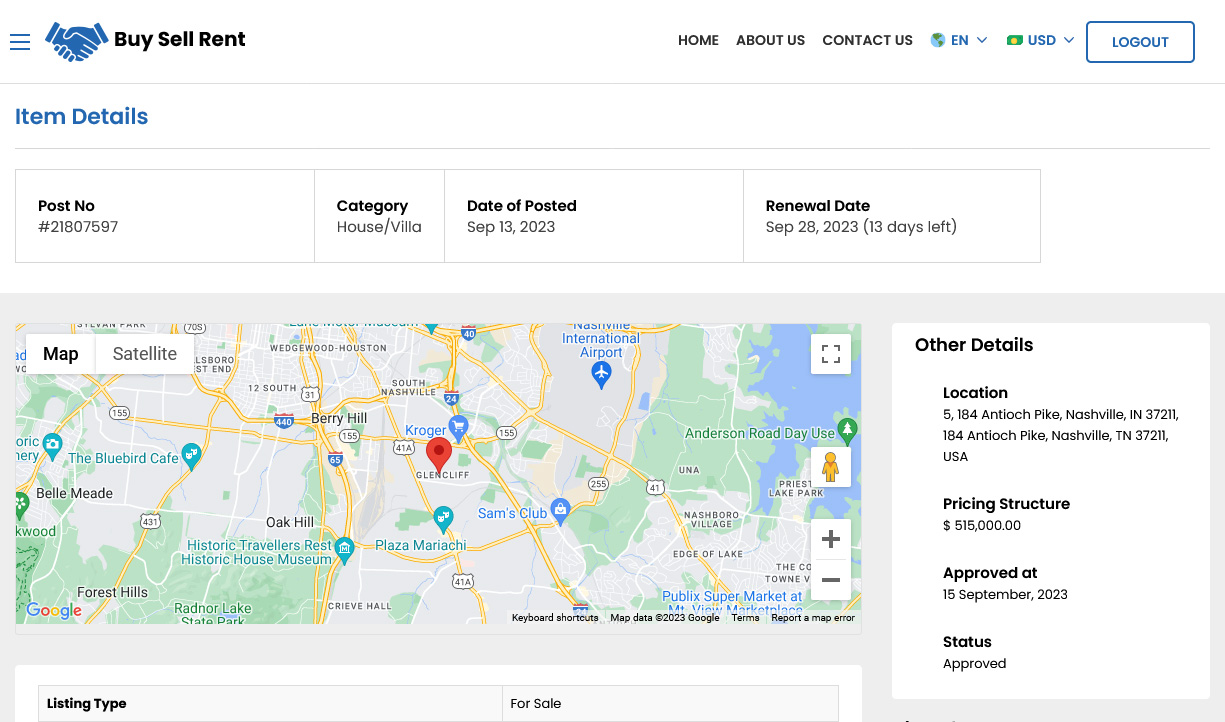
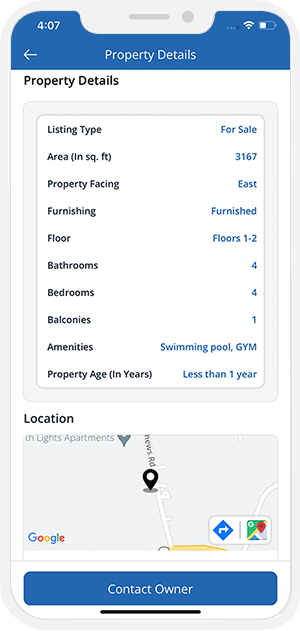
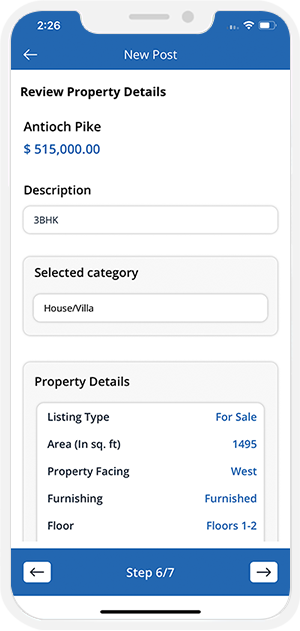
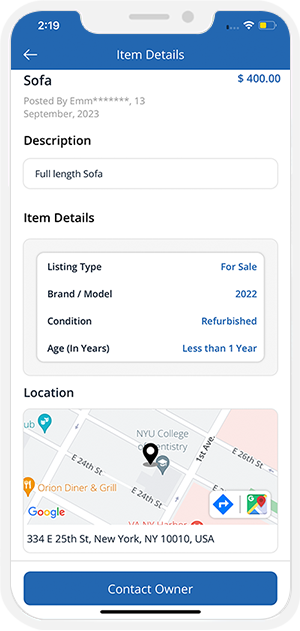
- On the “Property Details” page, Users can view more Images of the Property uploaded by the owner, its Resale Value / Rent Value, Location, and a Short Description.
- Also, users can see its Listing Type, Area, Furnishing, Number Of Floors, Bedrooms, Available Amenities, etc.
- Users can view the Property’s Location on the Map as well.
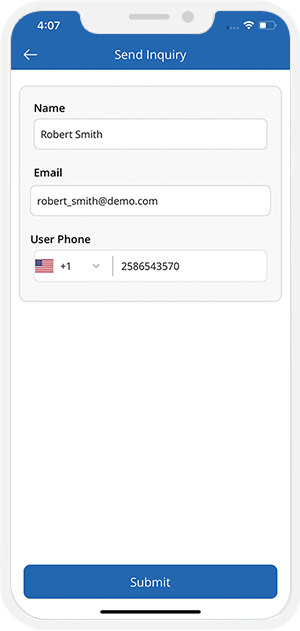
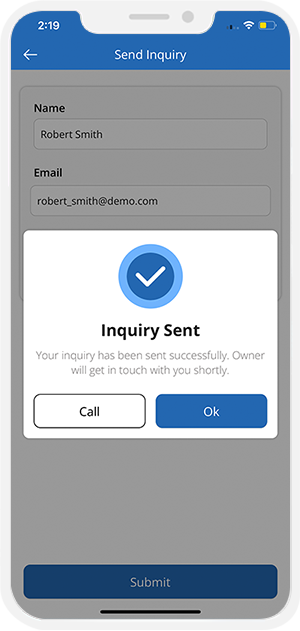
- To get in touch with the Property Owner and get more Details, users can fill out an Inquiry Form.
- User interested in the property will send an "Inquiry” form providing the contact details like Name, Email etc.
- By tapping on "Submit" button, the user receives a notification informing "The inquiry has been sent successfully, and the owner will get in touch shortly".
- Users can also connect with the owner by tapping the "Contact Owner" button at the bottom of the screen for further discussion.
- Users can easily post a new listing for a property that they want to sell or rent out.
- Users who want to Sell or rent out a Property can tap on the “Buy, Sell & Rent Real Estate” Section.
- As soon as they tap here, they will be redirected to a new screen where they can tap on “New Listing” to post Property details.
- After tapping on “New Listing,” an entire list of Property Categories will be displayed.
- Now, Users can select their Property type (say, Residential Apartment).
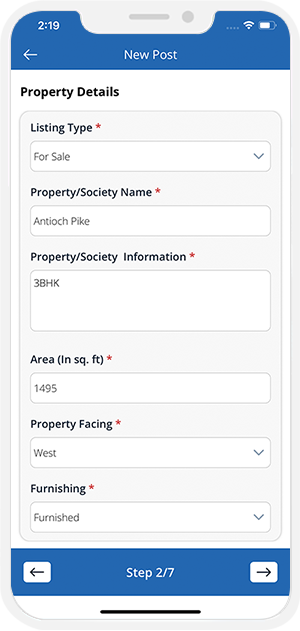
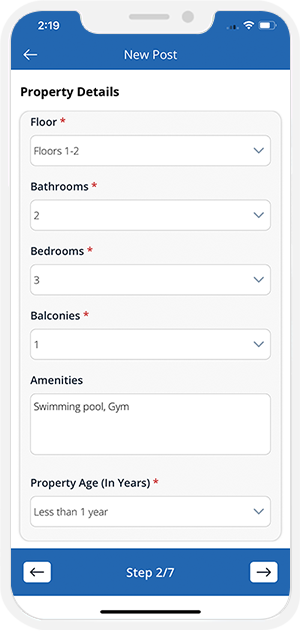
- On the “New Post” page that appears, they can start filling in the details of the property, like Area, Furnishing, Society name, Number of floors, Property age, etc.
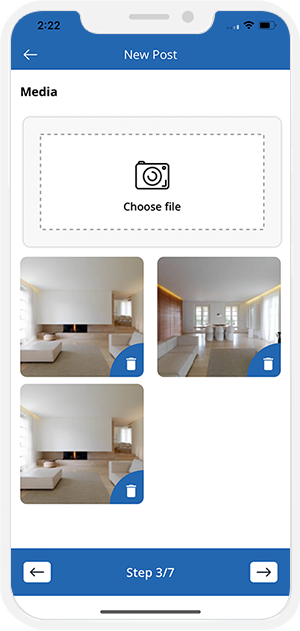
- After entering all the Property details, the user can upload multiple images of their Property that buyers will see.
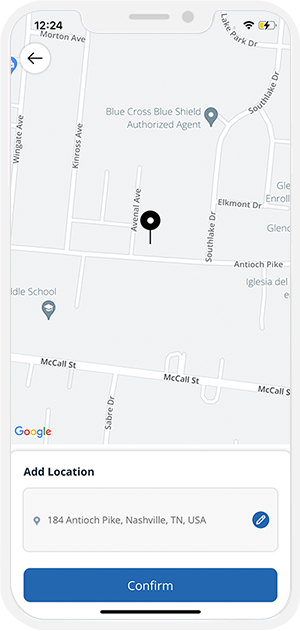
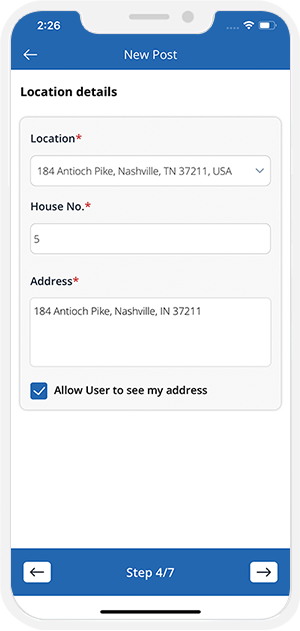
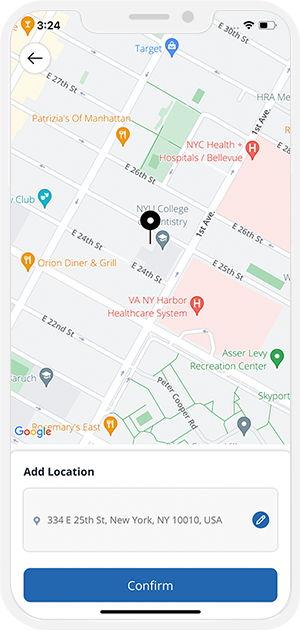
- After uploading images, the User will be redirected to the “Add Location” Screen.
- Here, the User can pin the exact location of the Property and add a proper address that will be visible to users browsing their Property.
- If the Property owner doesn’t want their address to be displayed in the listing, they can choose to hide it by unselecting the given checkbox.
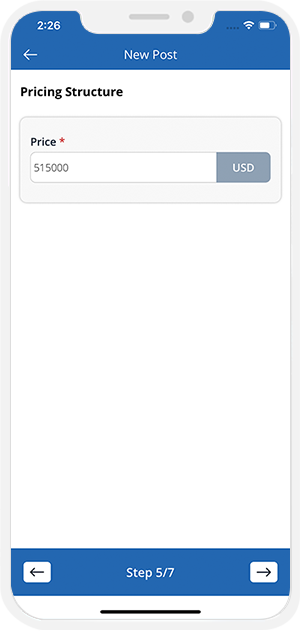
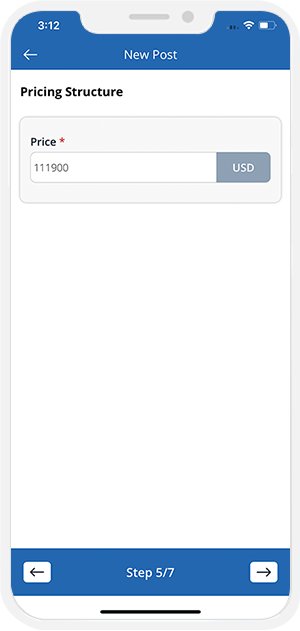
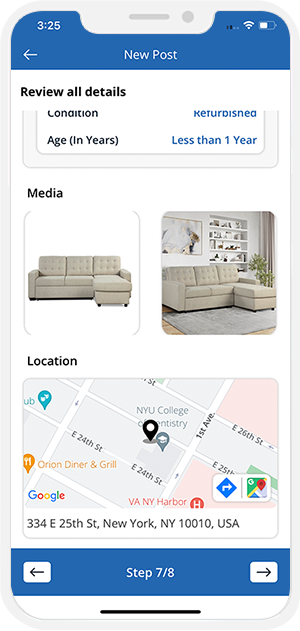
- Next, the user can add the resale or Rent Price and review the Property details they have filled out before posting the listing.
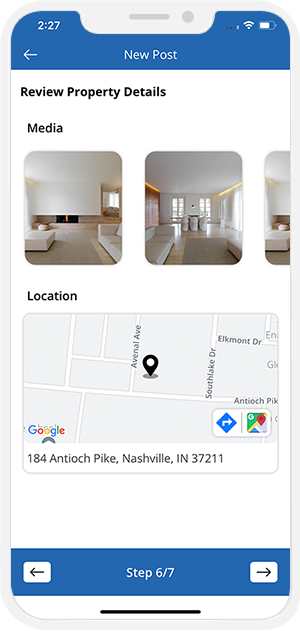
- The User can review the photos they have uploaded, the pinned location, and the address before posting the listing.
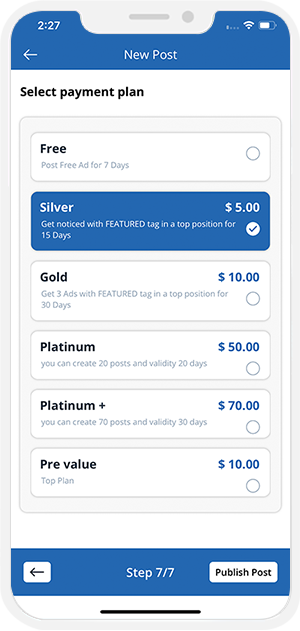
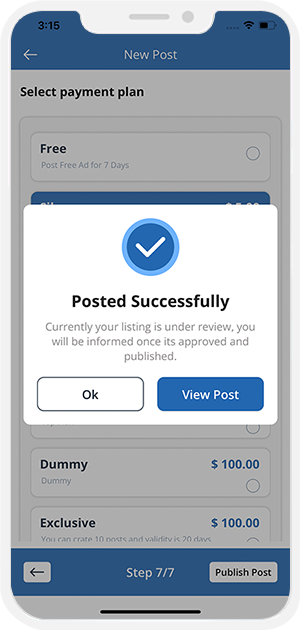
- Finally, they can choose a suitable plan (Free or Paid) depending on their requirements.
- Buying a paid Ad can help the User list the Property as "Featured" and reach more buyers.
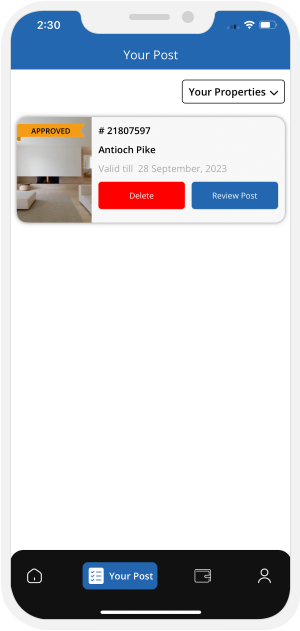
- Users will get a confirmation notification after they submit their Property listing on the App.
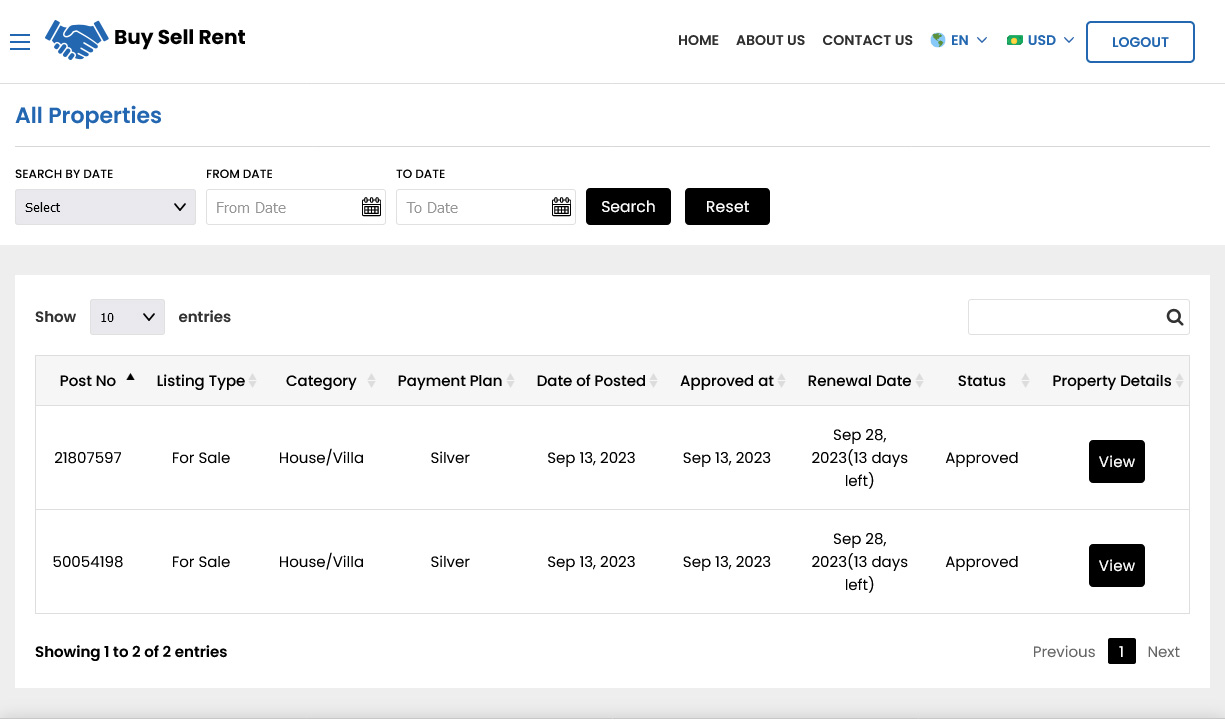
- Users can now see their listing under "Your Post" and manage it from the same page.
- Users can delete and review the listing whenever they want.
- Once Property is approved by the Admin, it will be displayed on the Application.
- Users can Buy, Sell & Rent Cars like Luxury, SUVs, Sedan etc. on the App.
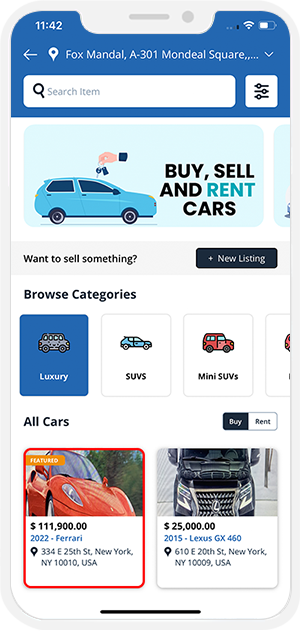
- Users who want to Buy or Rent a Car can tap on the “Buy, Sell & Rent Car” Section.
- As soon as they tap here, an entire screen with nearby available Cars for Sale & Rent will be displayed.
- Now, Users can browse different Categories according to their needs and find relevant Car in the chosen category.
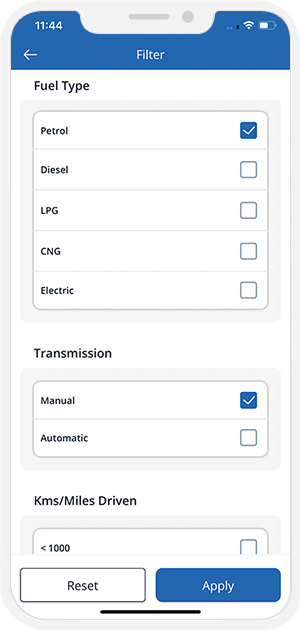
- The User can search Car by name OR can filter it by “Fuel Type”, “Transmission”, “KMS / Miles Driven”, “Condition”, etc.
- The User need to select required filters and then tap on “APPLY” button at bottom.
- It will show the Cars based on the filter selected.
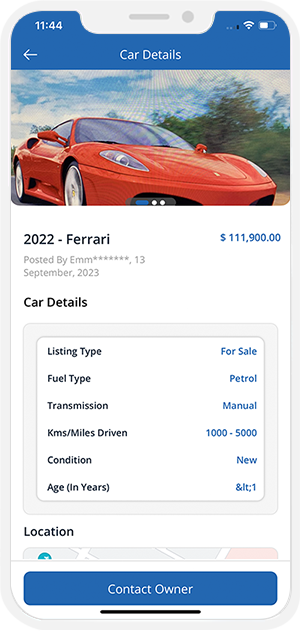
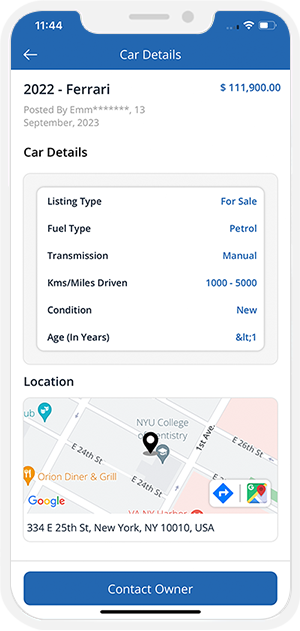
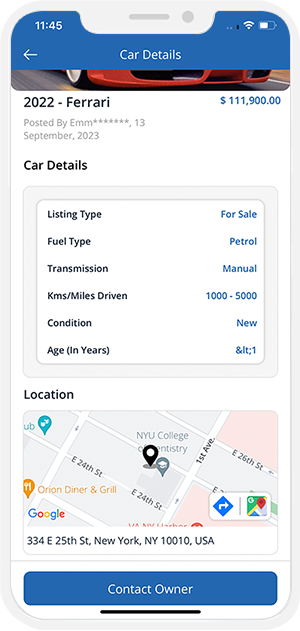
- Tapping on any Car, User can view Car details like Name, Model, Fuel Type, Transmission etc.
- User can also see the location of Seller.
- User can contact Owner by tapping on "Contact Owner".
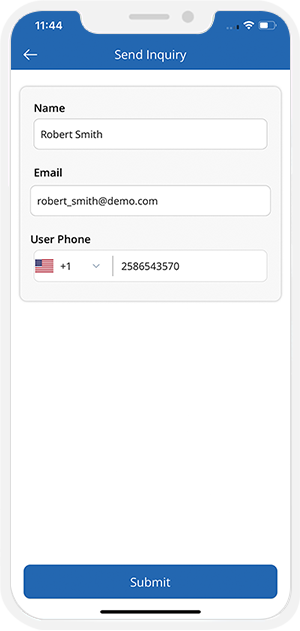
- As soon as User taps on "Contact Owner", a form will be displayed.
- User can enter his details like Name, email and contact details.
- After entering all the details, User can taps on Submit button to submit his query.
- By tapping on "Submit" button, the user receives a notification informing "The inquiry has been sent successfully, and the owner will get in touch shortly".
- Users can also connect with the owner by tapping the "Contact Owner" button at the bottom of the screen for further discussion.
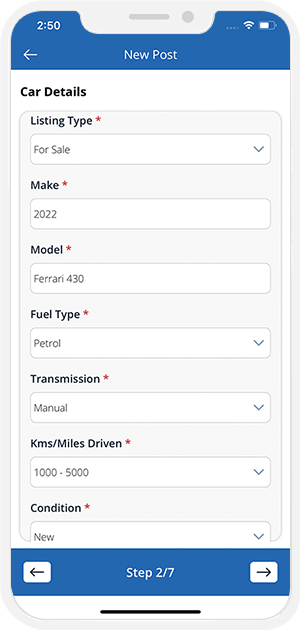
- User can taps on "Buy,Sell & Rent Cars" On Home Screen and can easily post a new listing for a Car that they want to sell.
- Users who want to Sell & Rent a Car can tap on the “New Listing” button.
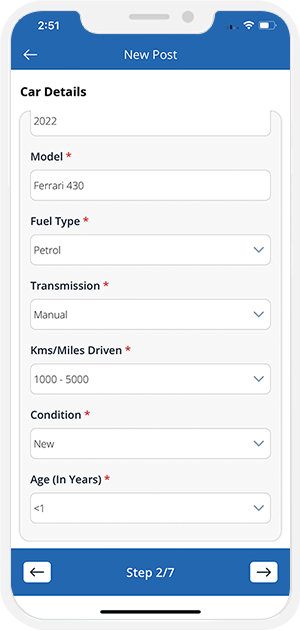
- User can enter choose Car Type like Hatchback, Sedan, Luxury, SUV, Mini SUVs etc.
- User can enter more details like listing type (Rent / Sell), Make, Model, Fuel Type etc.
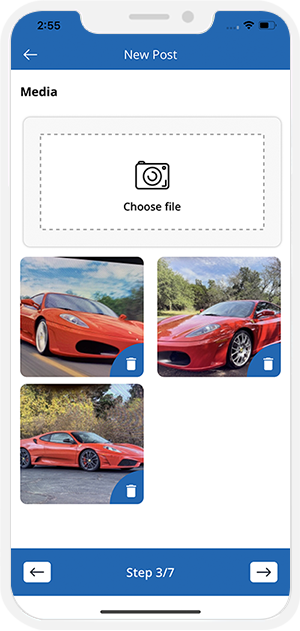
- After entering all the Car details, the User can upload multiple images of their Car that buyers will see.
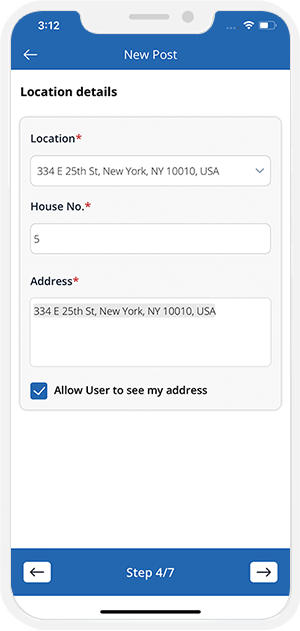
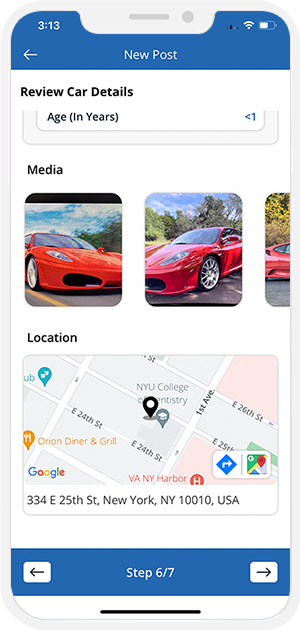
- After uploading images, the User will be redirected to the “Add Location” page.
- Here, the uUer can pin the exact location of the Car and add a proper address that will be visible to users browsing their Car.
- If the Car owner doesn’t want their Address to be displayed in the listing, they can choose to hide it by unselecting the given checkbox.
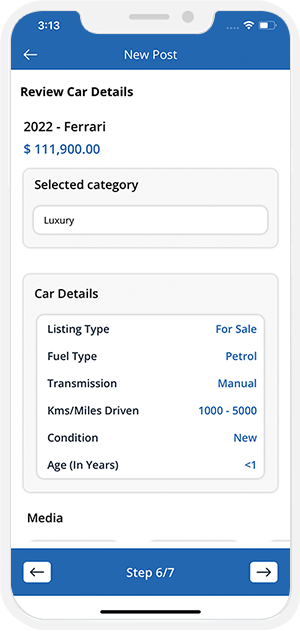
- Next, the User can add the resale/rent price and review the Car details they have filled out before posting the listing.
- The User can review the photos they have uploaded, the pinned location, and the address before posting the listing.
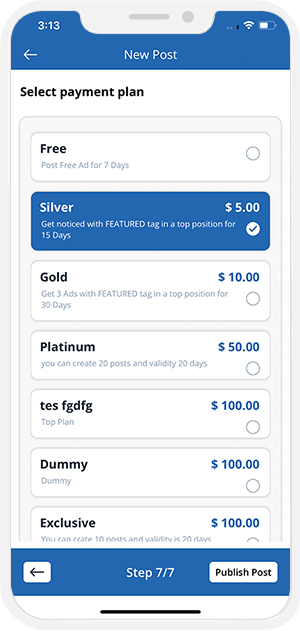
- Finally, they can choose a suitable plan (Free or Paid) depending on their requirements.
- Buying a paid Ad can help the user list the Car as "Featured" and reach more buyers.
- Users will get a confirmation notification after they submit their Car listing on the App.
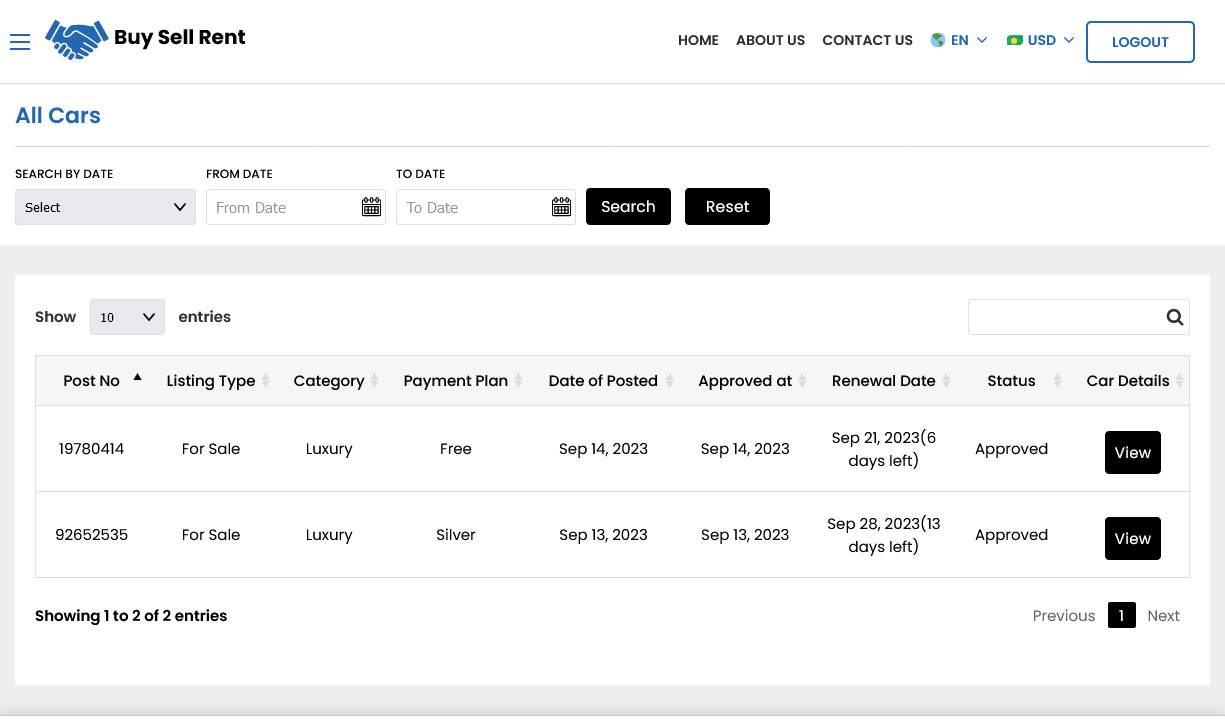
- Users can now see their listing under "Posted Items" and manage it from the same page.
- Users can delete and review the listing whenever they want.
- After Admin's approval, Car details will be displayed on the Application.
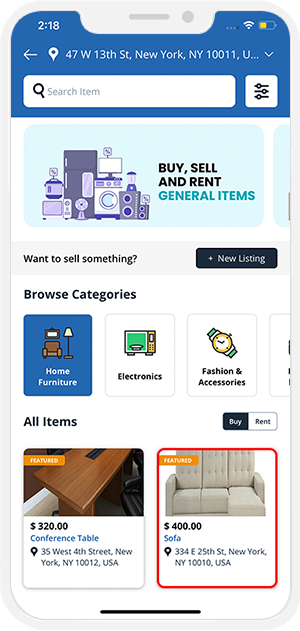
- Users can buy and sell general items like Electronics, Furniture, Lawn & Garden tools, etc.
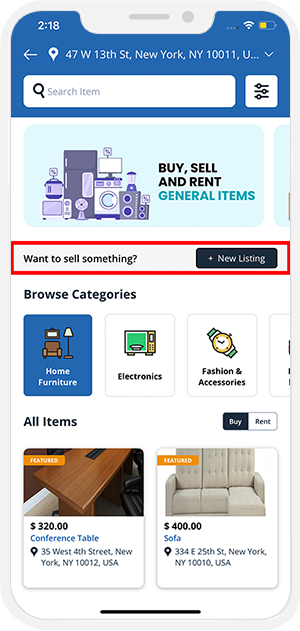
- To find an item, the user needs to go to the “Buy, Sell & Rent General Items” section.
- On the landing page, Users will see the options like Browse Categories, Find an Item, etc.
- Users can now tap on the category (say, Home Furniture) to start browsing for the Item they are looking for.
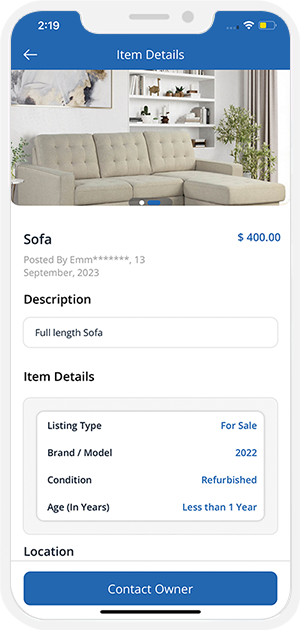
- By tapping on an item, a Detailed Information Page will appear.
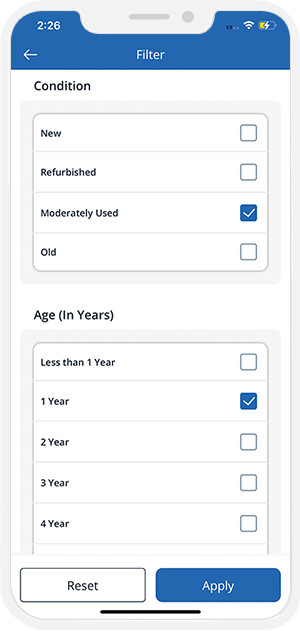
- The User can search General items by name OR can filter it by “Condition”, “Age (In Years)”, etc.
- The User need to select required filters and then tap on “APPLY” button at bottom.
- It will show the General items based on the filter selected.
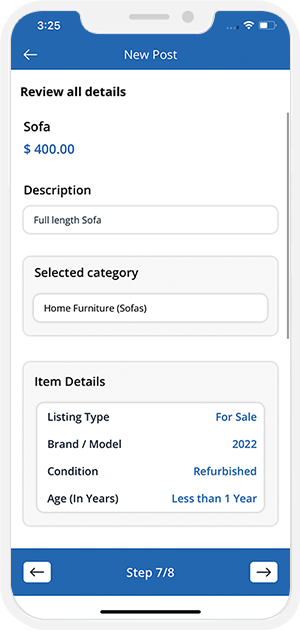
- On the Item details page, users can see a Short Description of the item, and other information like Listing Type, Brand/Model, Condition, etc.
- Users can also see the Rent or Sale price of the item and the Location of the owner on the map.
- If the user wishes to Purchase/Rent the item or get more information, they can tap on Contact Owner.
- By tapping on Contact Owner, an Inquiry form will appear.
- User interested in the General Item will send an "Inquiry” form providing the contact details like Name, Email etc.
- By tapping on "Submit" button, the user receives a notification informing "The inquiry has been sent successfully, and the owner will get in touch shortly".
- Users can also connect with the owner by tapping the "Contact Owner" button at the bottom of the screen for further discussion.
- Users can Buy, Sell, & Rent General Items on the app.
- The user who wants to sell an item or put it on rent has to post a listing first.
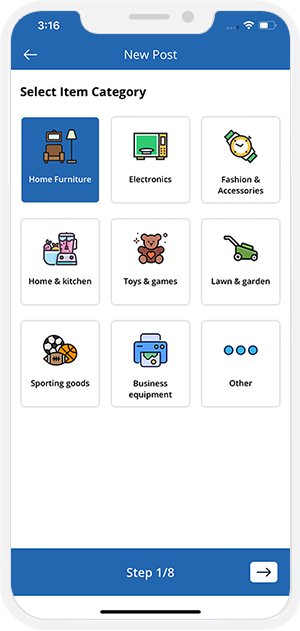
- The user has to tap on “Buy, Sell, & Rent General Items” and then, tap on the “New Listing” option on the page that appears.
- The user now has to select the item category such as home furniture, electronics, fashion & accessories, lawn & garden tools, etc.
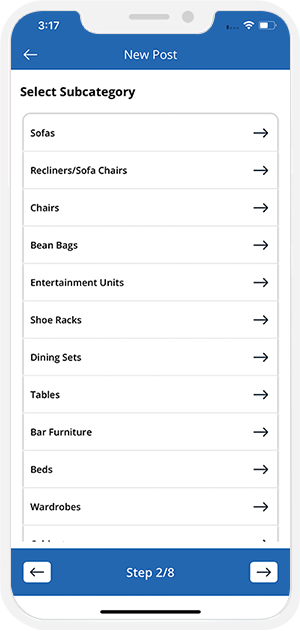
- Suppose the user selects Home Furniture. Now, under the subcategory, they can select items such as sofas, chairs, tables, etc. that they want to sell or rent out.
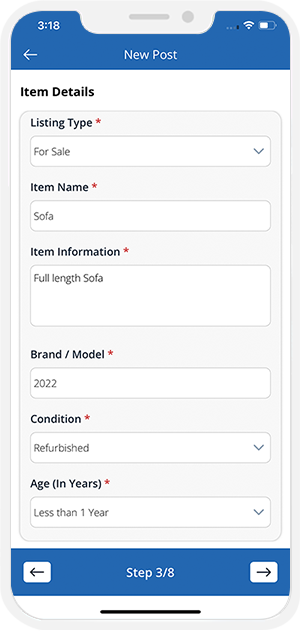
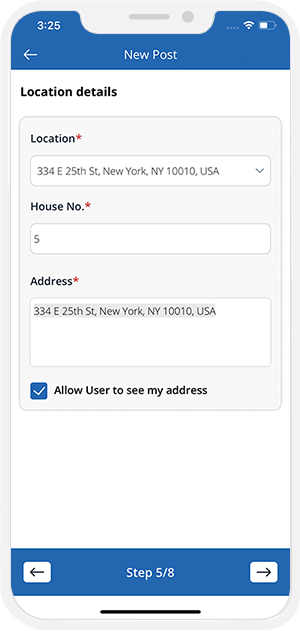
- After choosing the subcategory, the user needs to fill out item information like listing type, item name, condition, etc.
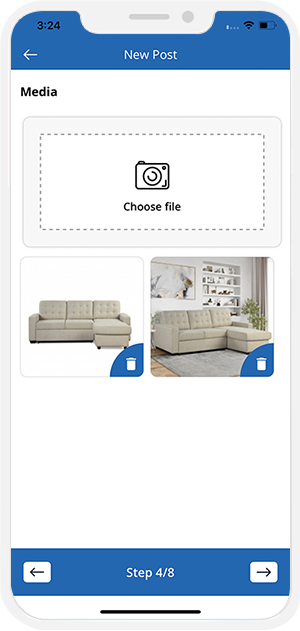
- Next, they can add multiple images of the item for the buyer/renter’s reference.
- The user can pin the location on the map.
- After tapping on “Add Location,” they need to enter the detailed address.
- If they don’t want other users to see their address, they can opt out of it by unselecting the checkbox.
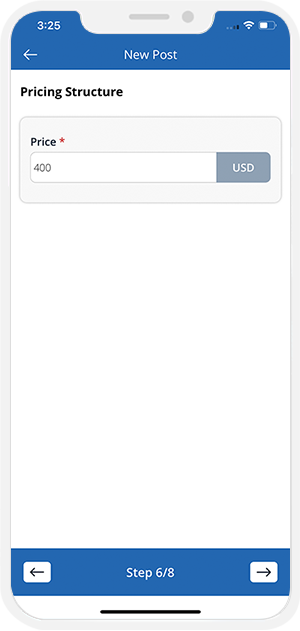
- In the next step, the user needs to add the resale/rent price of the item and review all the entered details.
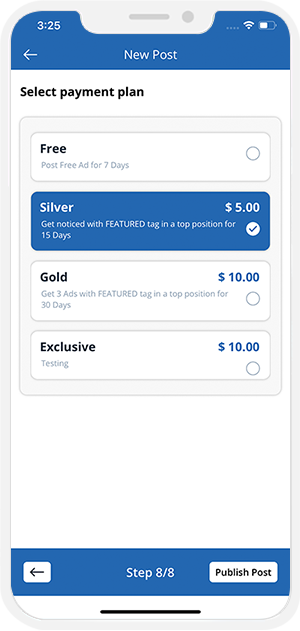
- Once the user reviews the uploaded information, they can proceed by selecting a suitable plan (Free or Paid).
- By purchasing a Paid Plan, the user will be able to showcase their listing as “Featured".
- Featured Ads get priority and are displayed on top of all other posts.
- As soon as the user chooses a payment plan, a push notification will pop up with a confirmation message.
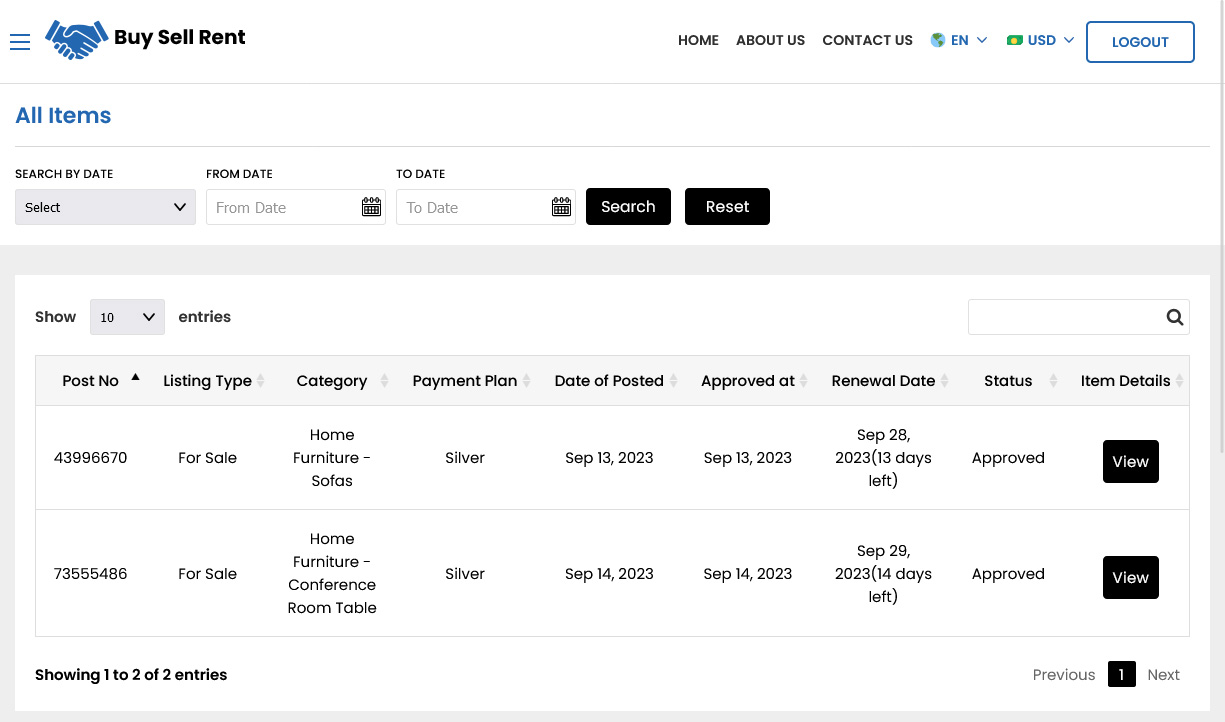
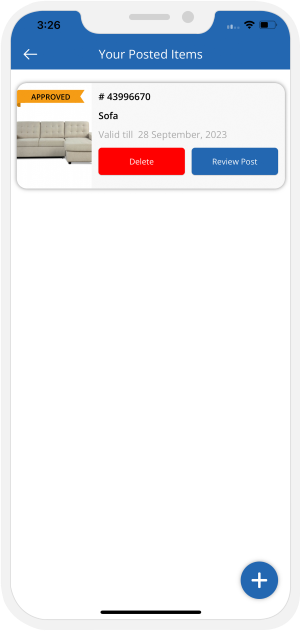
- Under “Posted Items”, the user will be able to delete the listing if they want and review it.
- After Admin's approval, Item will be displayed on the Application.
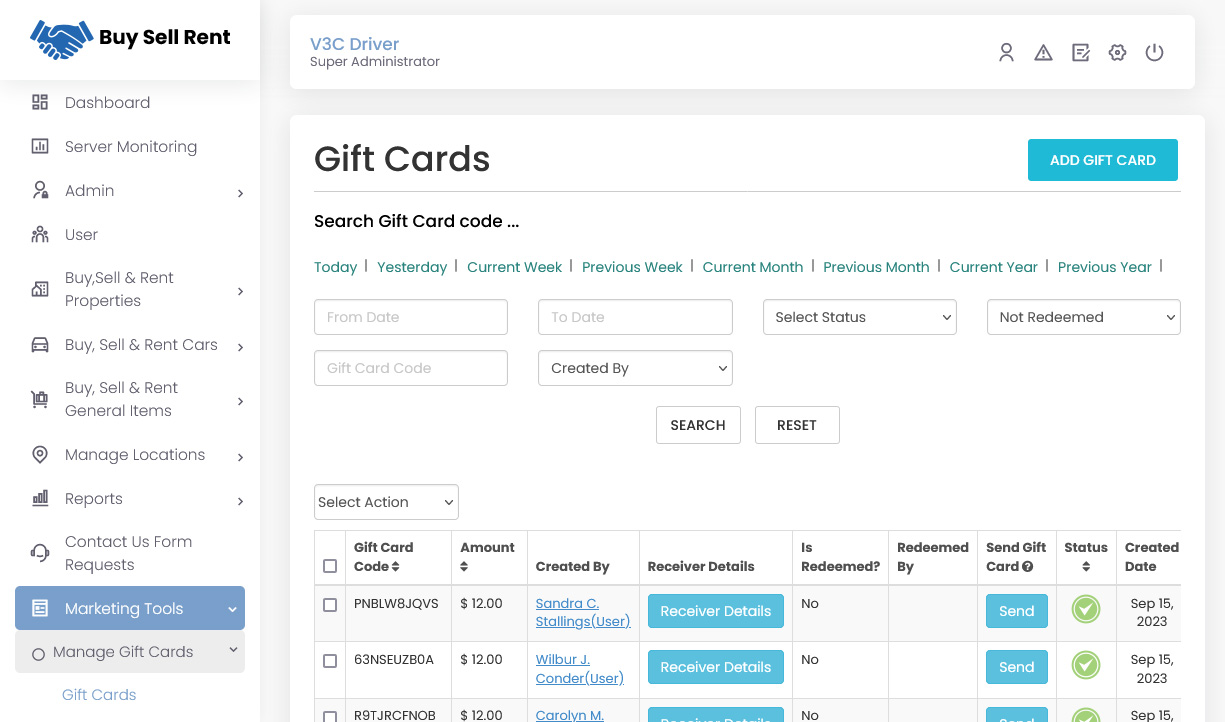
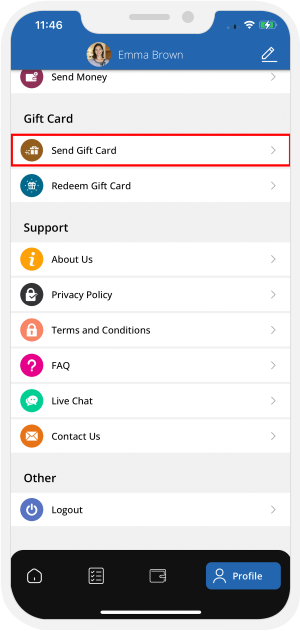
- Users of the App can send Gift Certificate to their loved ones using the Buy Sell Rent App.
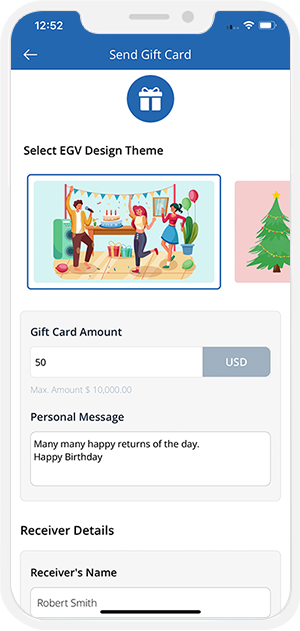
- The User needs to select the "Send Gift Card" option.
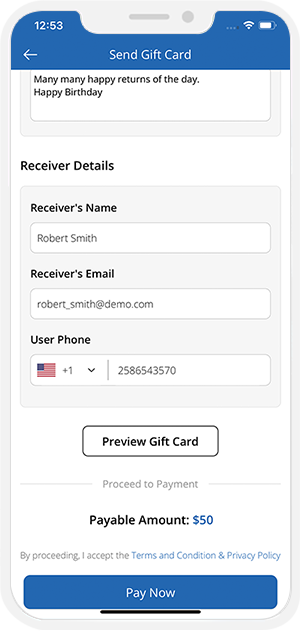
- As soon as they choose the option, they will be redirected to the “Send Gift Card” Screen where they can choose a Gift Card Theme (like Birthday, Anniversary, Christmas, etc.), enter the Card Amount, write a Personal Message, and Recipient Details (Name, Email Address, Phone Number).
- As soon as the User enters the Receiver’s details, they can tap "Pay Now" to proceed with payment.
- The user can review the Gift Card before making the Payment.
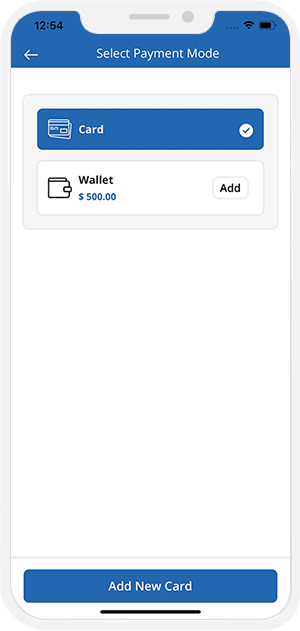
- User can make Payment using Wallet, Cash or Card.
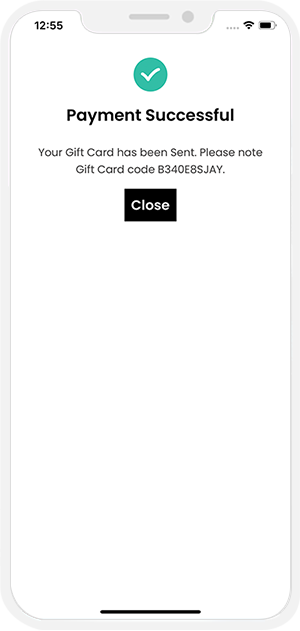
- As soon as the payment is completed and the Gift Card is sent to the recipient, Payment Confirmation will appear on the screen.
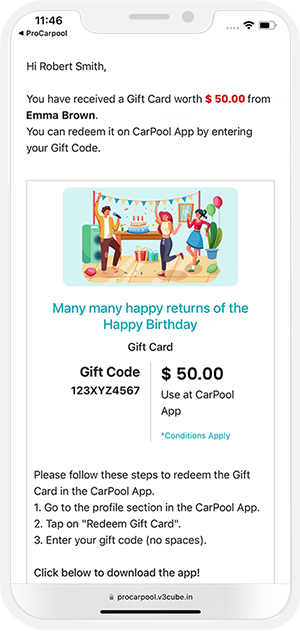
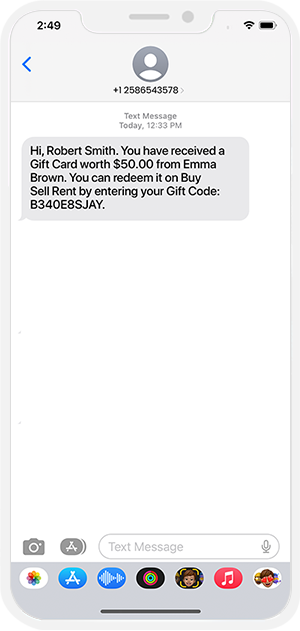
- As soon as the Gift Card is sent, the recipient will receive an SMS and email.
- The User can see the Instructions for redeeming the Gift Card in the SMS and email.
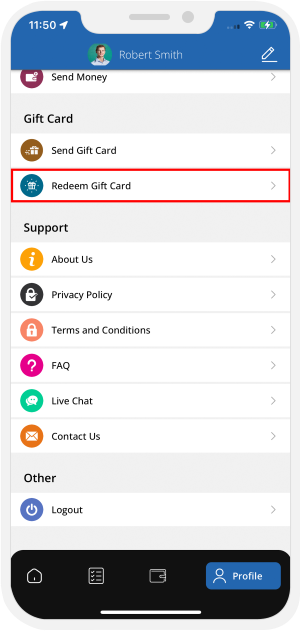
- To redeem the received Gift Certificate, the user needs to go to the ‘My Profile’ section and tap on 'Redeem Gift Card'.
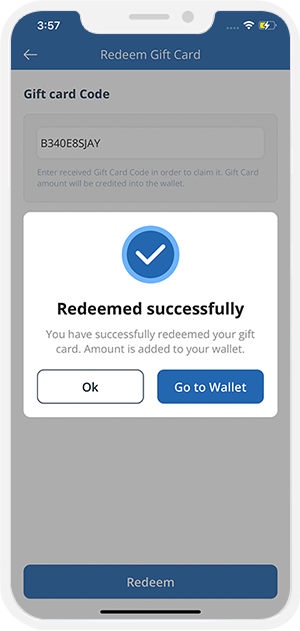
- Now, the User can enter the Gift Card Code and claim it.
- The Gift Card Amount will be added to User's In-App Wallet.
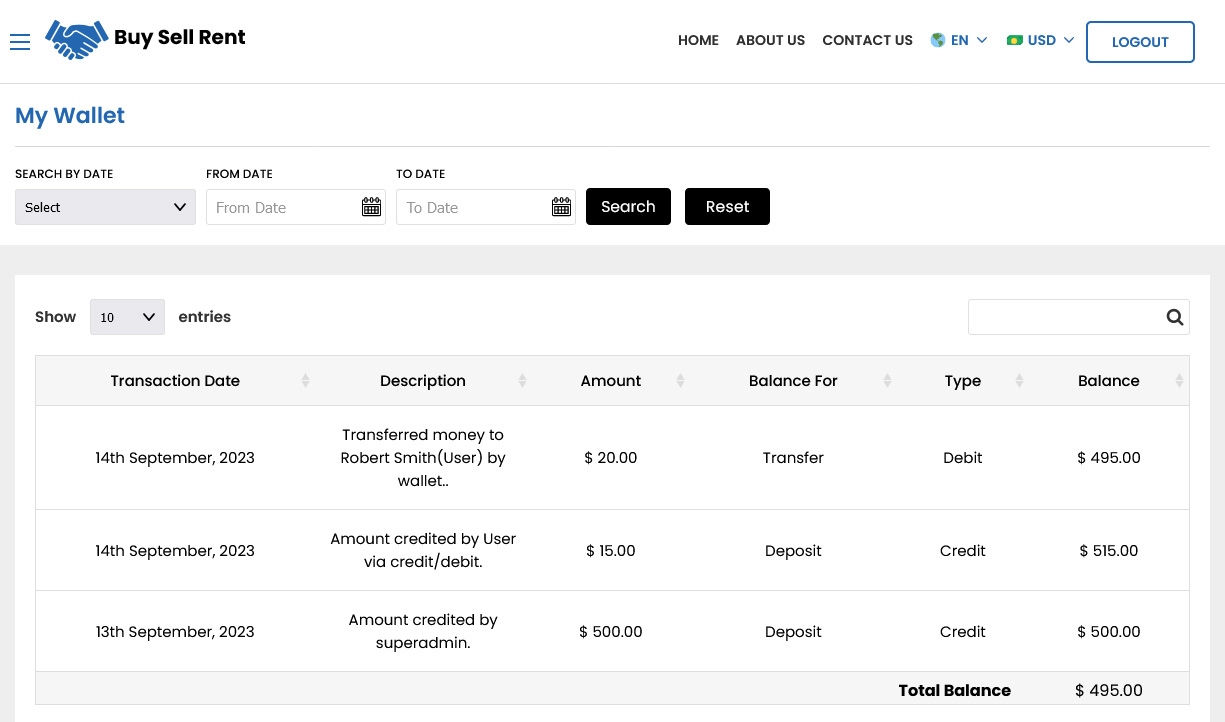
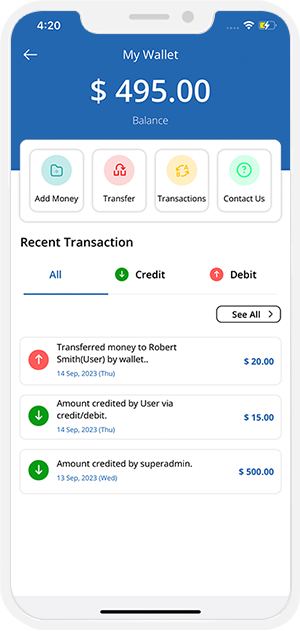
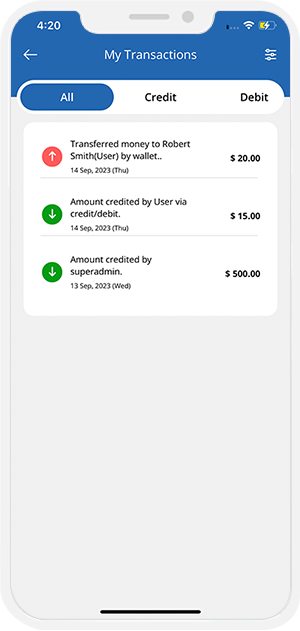
- The User will have an in App wallet.
- This wallet can be recharged or topped up whenever they want.
- Users can pay for the booking using Wallet.
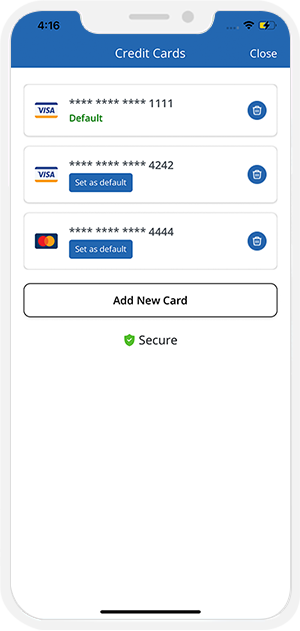
- User will have facility to add / save multiple cards in the App.
- They can make payment from any Card and can delete if needed.
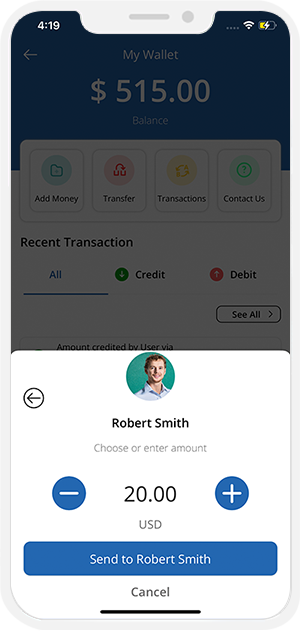
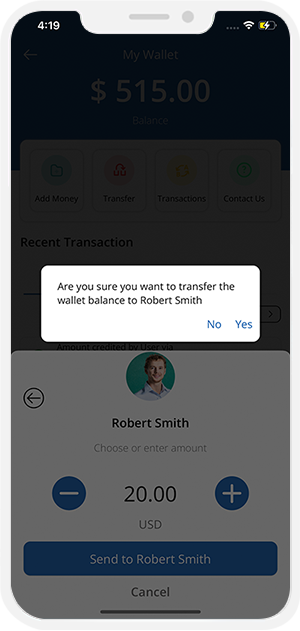
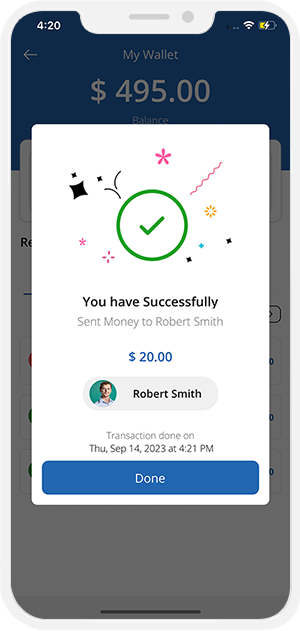
- Looking for a seamless way to make payments easy for your customers and assist the users to receive the money directly in their wallet. Then, the wallet-to-wallet money transfer feature will turn out to be a blessing in disguise for your customers.
- Through the pre-integrated wallet present, your customers can smoothly make payment through their wallet and have it sent to the other User's wallet especially if they do not have the change for the services that they have booked.
- All that they would need to do is select from the two options present in the wallet to whom they wish to send, the user and then choose their respective mobile number or email address and then they need to transfer the money from their wallet to the wallet of the another User.
- This feature will surely be a blessing in disguise for your users who may be wary of sharing their card details.
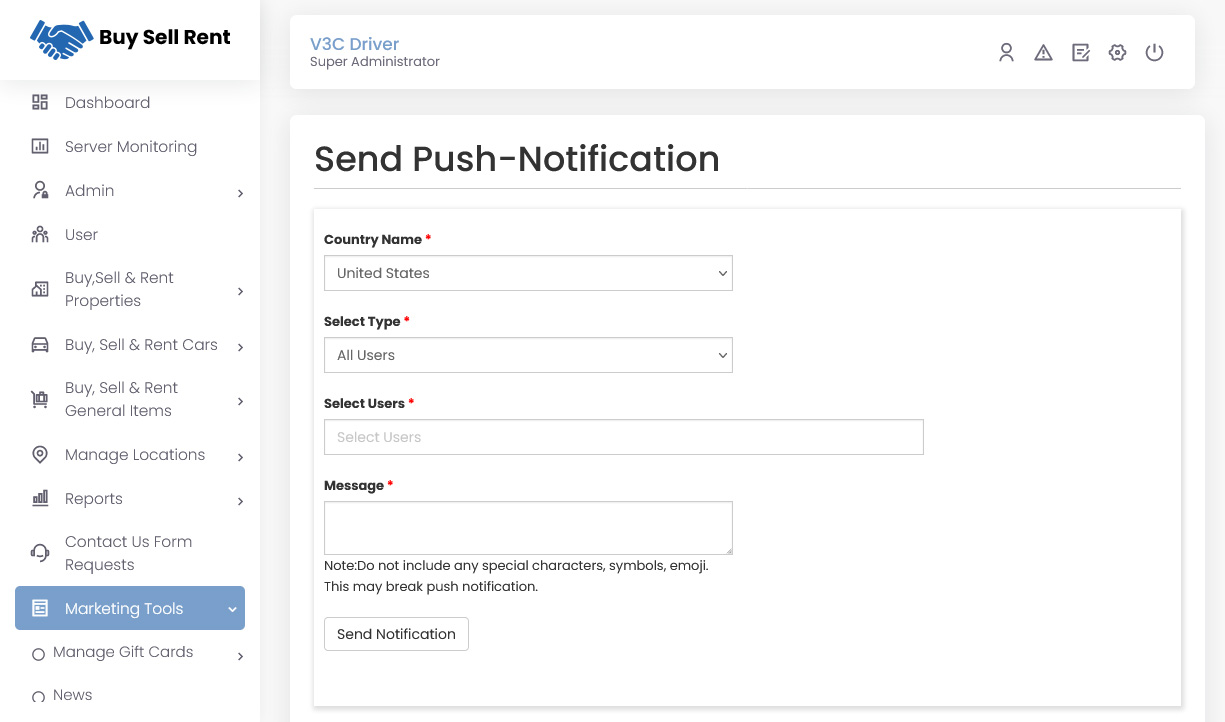
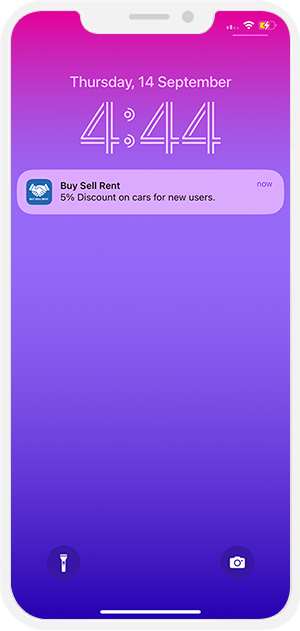
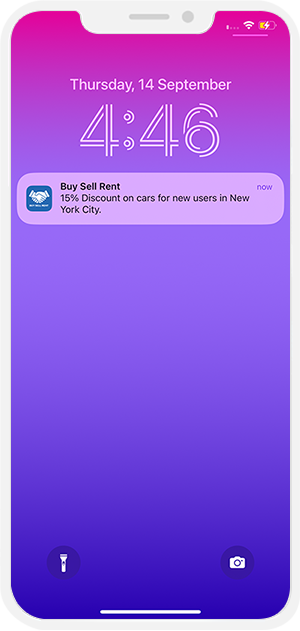
- App Owner will be able to send Push Notification to all Users of selected Location.
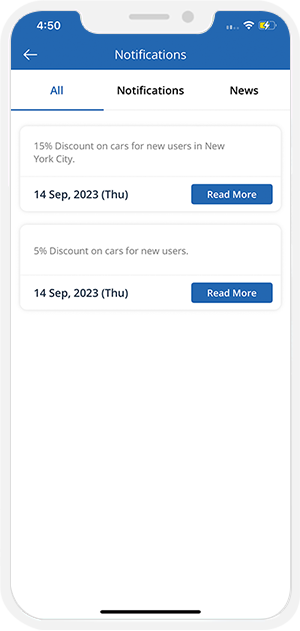
- User can view list of Notifications added by the Administrator of the App.
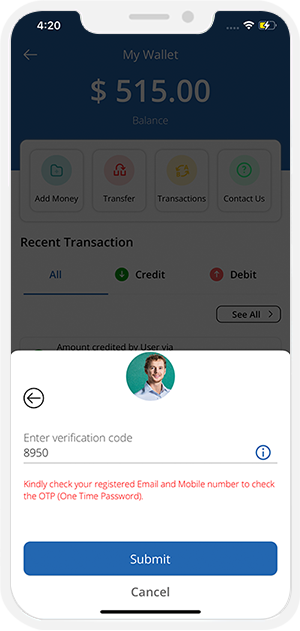
- Firebase Authentication provides backend Services to authenticate users by verifying their Email and Phone Number. Using this technology, you can avoid verification of User's Email and Phone Number that uses expensive 3rd party SMS.
- User can enter his Email or Phone Number and verify.
- An OTP will be sent to user on his Email or Phone Number for verification.
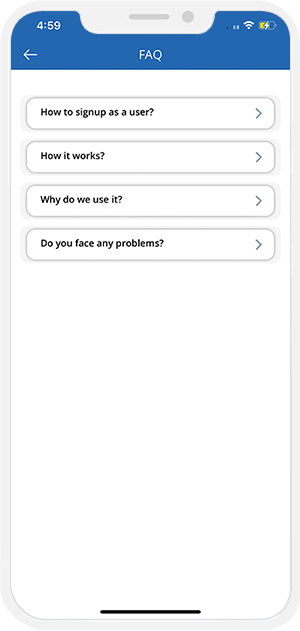
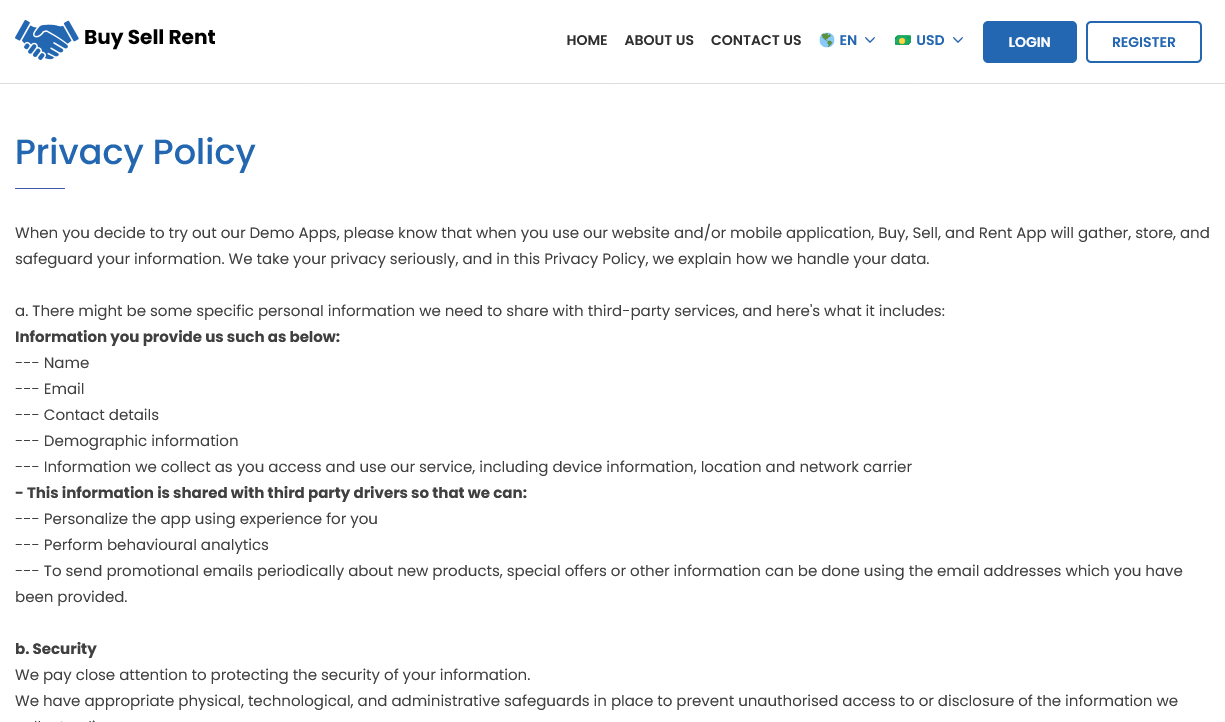
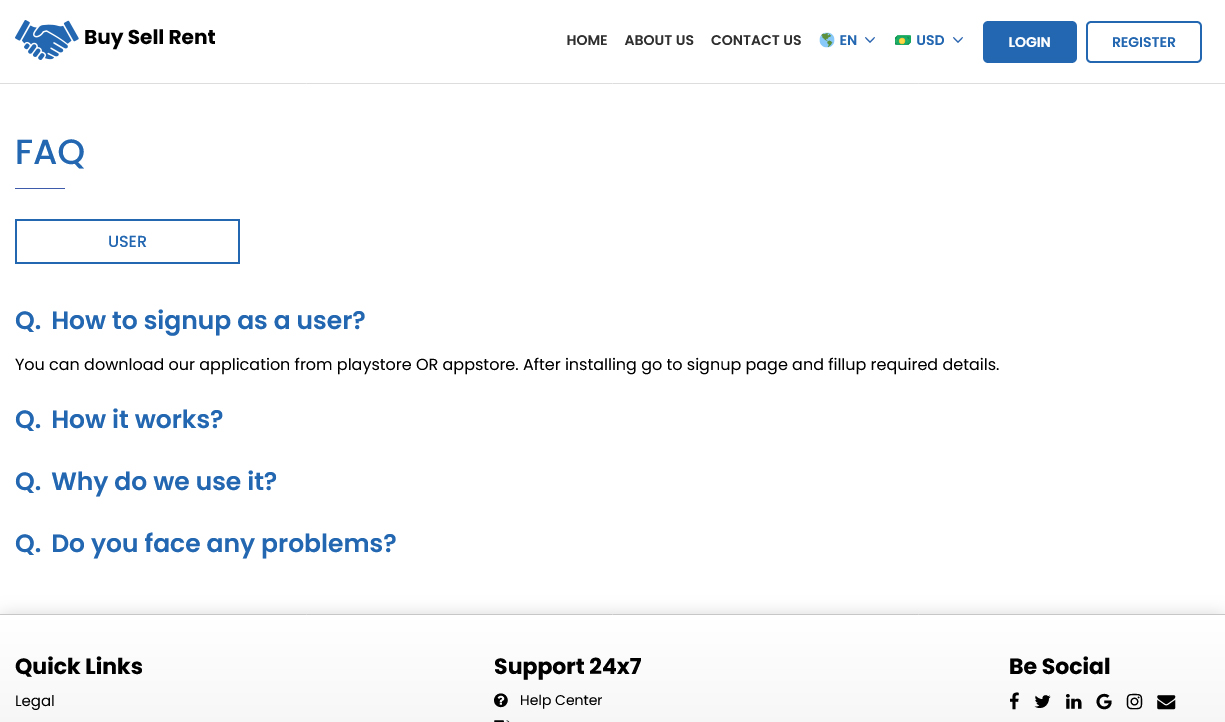
- This panel will give you all the other relevant information like About Us, Privacy Policy, Live Chat, Terms and Conditions, Contact US and FAQ.
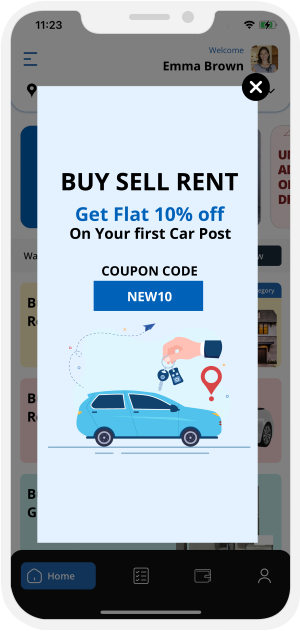
- Showcase your offers and promotions on the Home screen of the App. When the users open the App, they can see your advertisement.
- You can keep advertisement, promotional content and any kind of information that you want to highlight about the App right here.
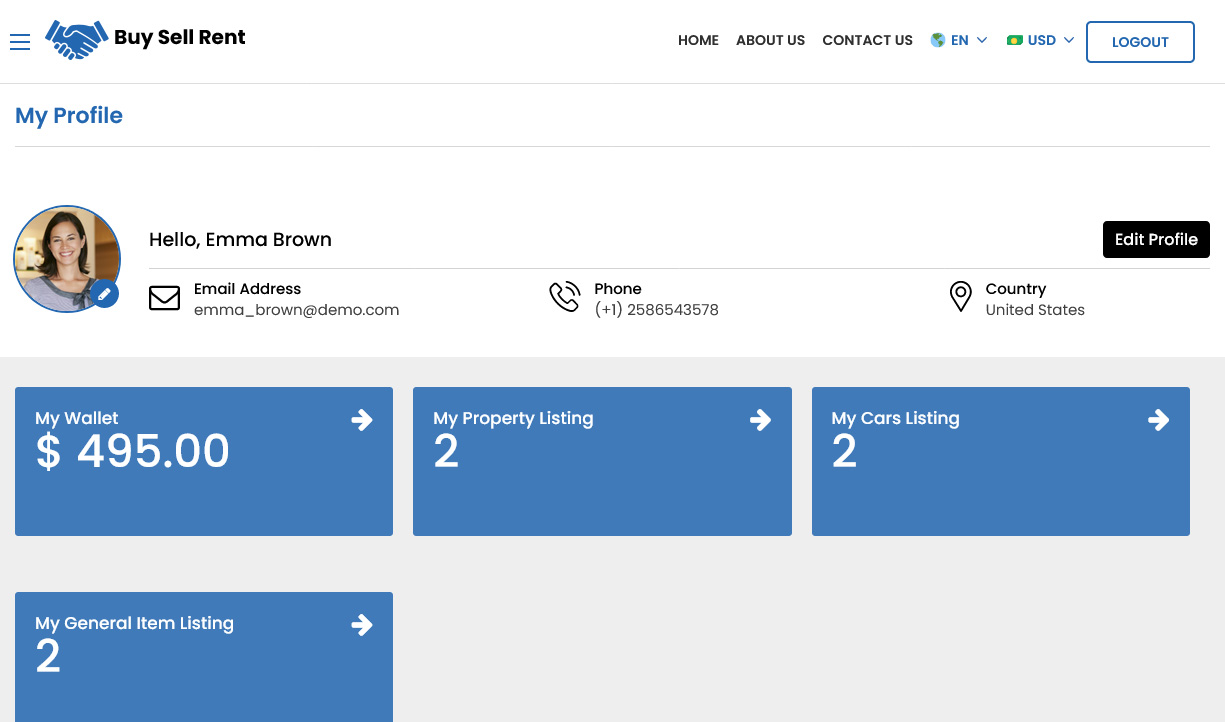
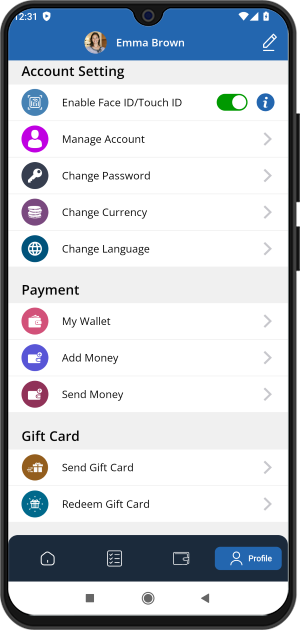
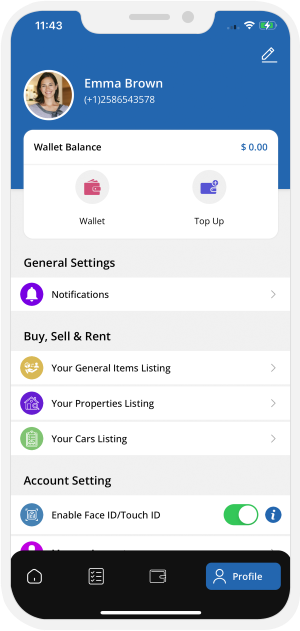
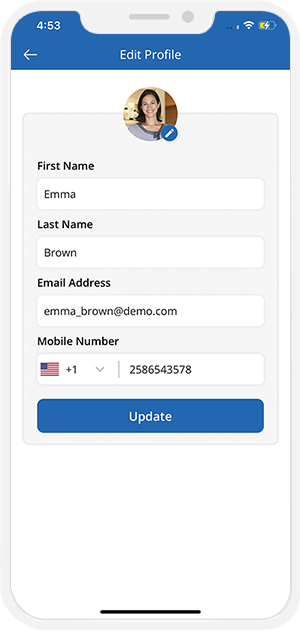
- User can manage their profile details like Photo, Name, Email Address, Mobile number, Preferred Language, Preferred Currency and Places from their My Profile Page.
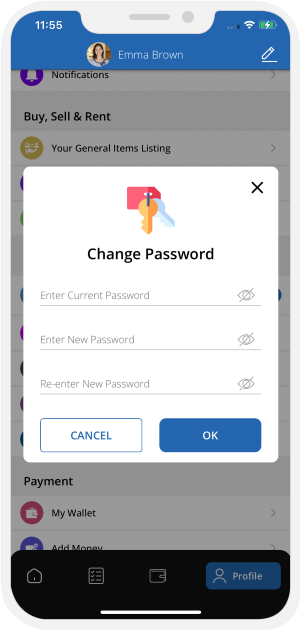
- They can change their password from Change Password Screen.
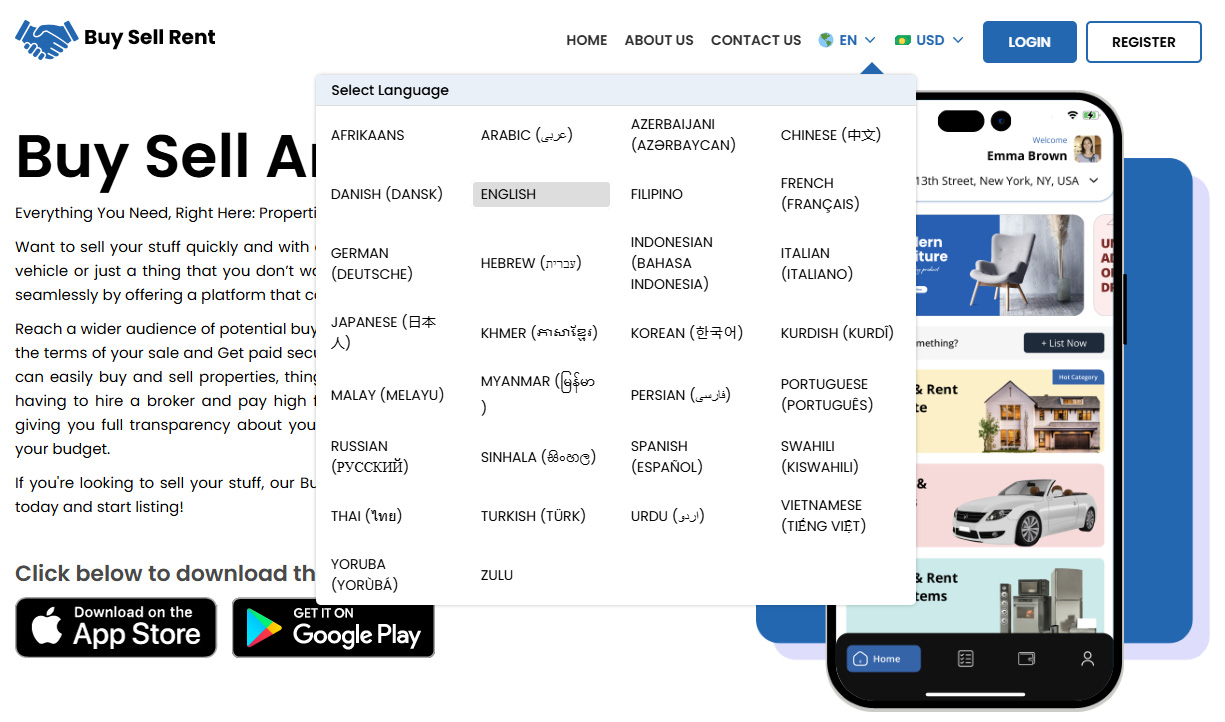
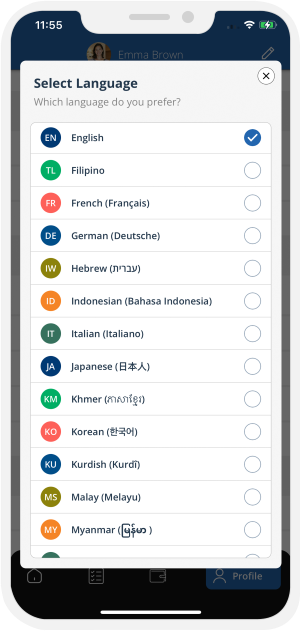
- User can change the Language of the App anytime.
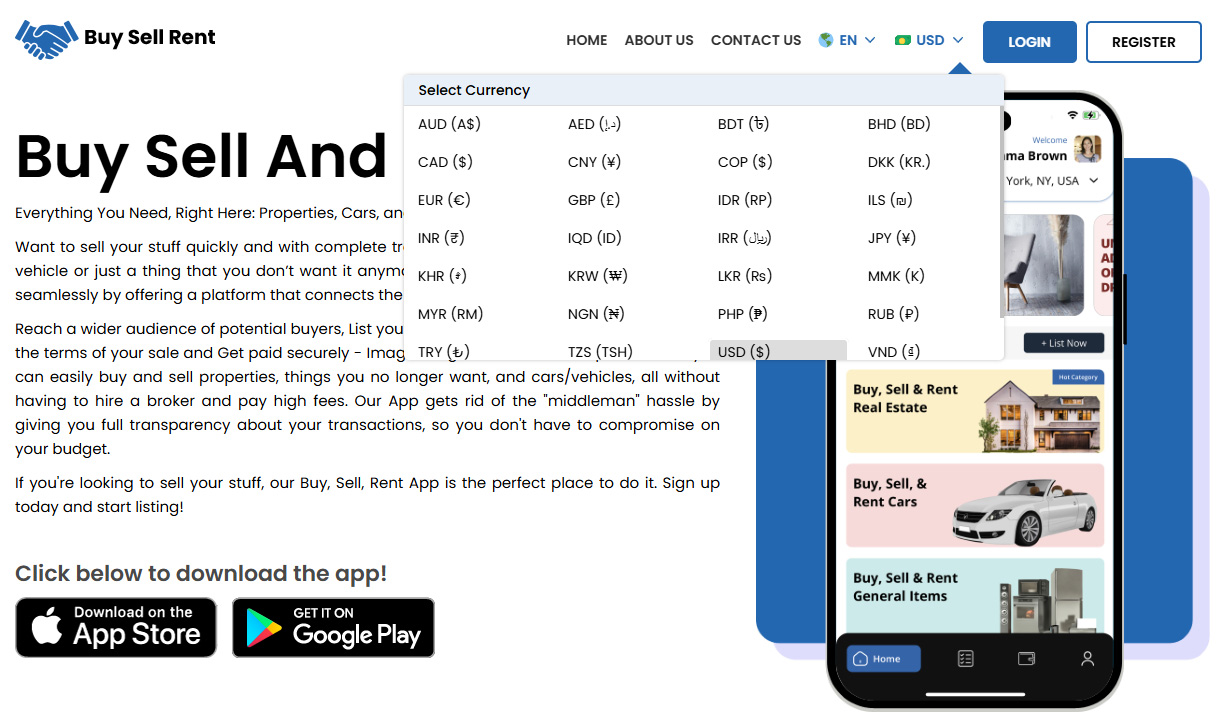
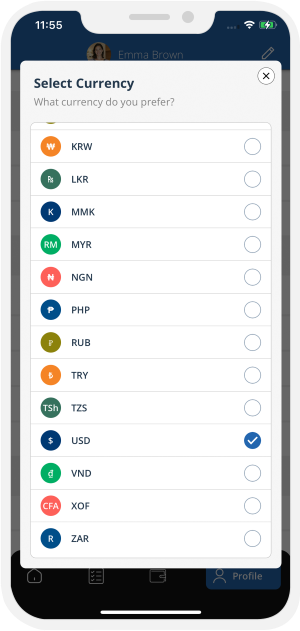
- User can change the Currency of the App anytime.
- Using this feature, the site owner can put the Facebook Advertisements in the Apps and generate revenue from it.
- Using this feature, the site owner can put the Google Ads in the Apps and generate revenue from it.
- There will be help and contact Pages on the Buy Sell Rent App.
- The administrator will be able to Edit the Information Pages from Back-End.
Delivery AppsLaunch your Delivery Business with Our Latest Delivery Apps
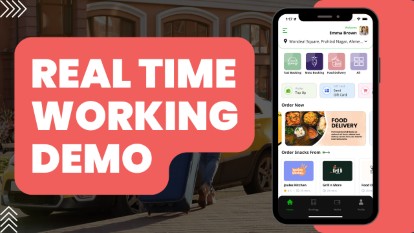
How Does It Work?If you wish to buy All in One Delivery App then, experience the real-time demo of the App. The video explains entire process from registration to review for all store and restaurant deliveries.
 ✕
✕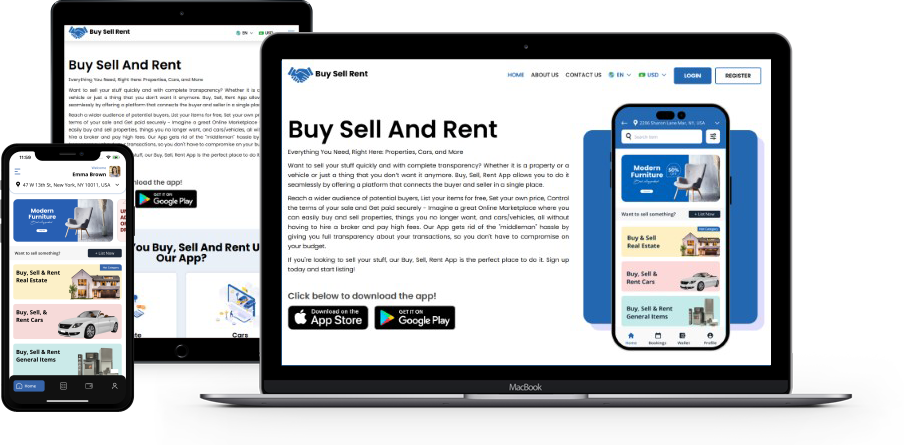
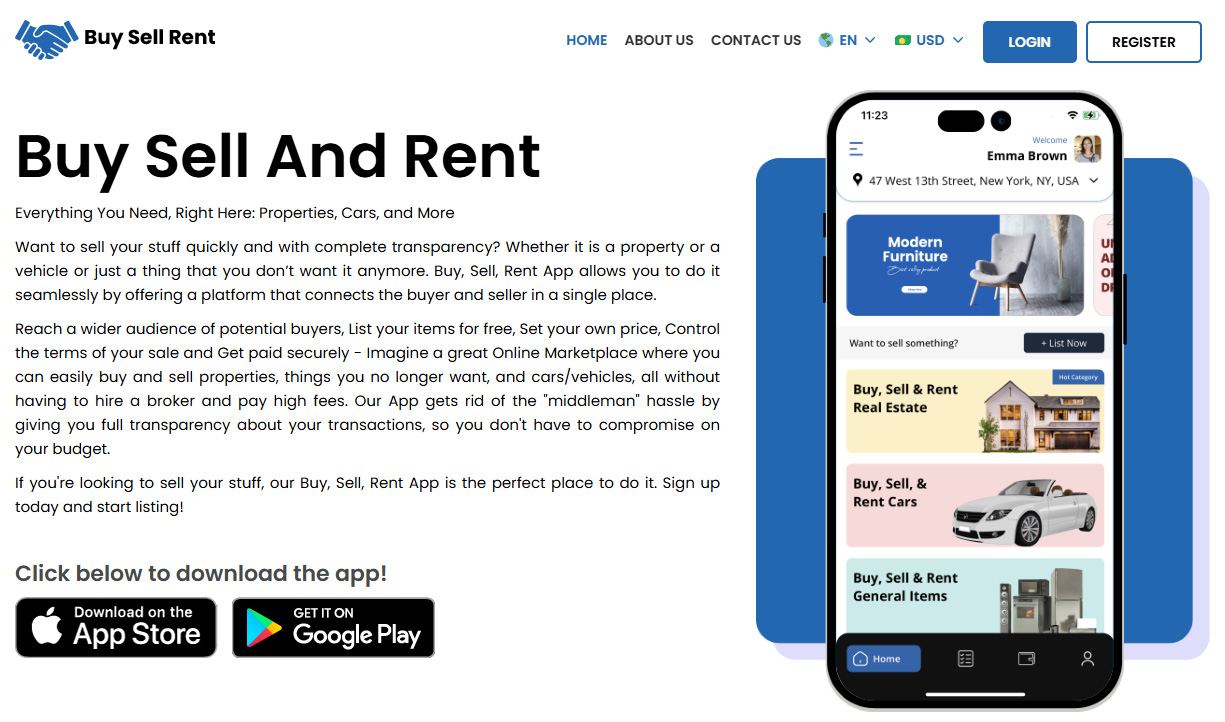
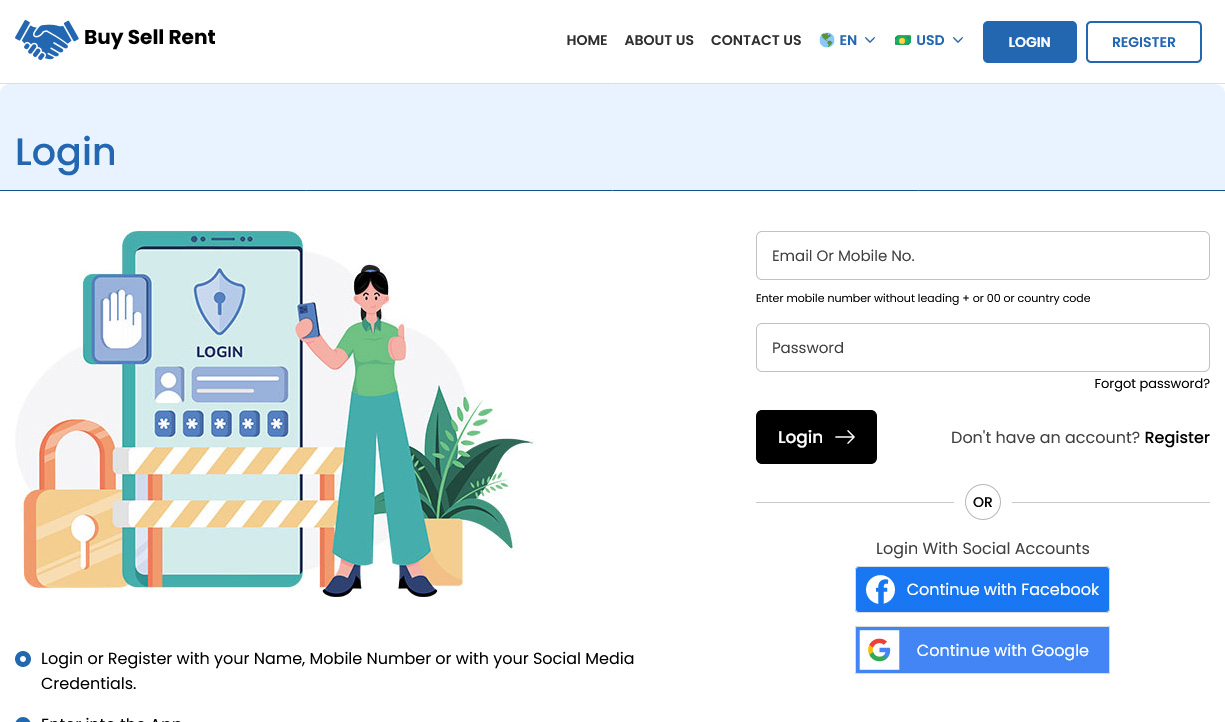
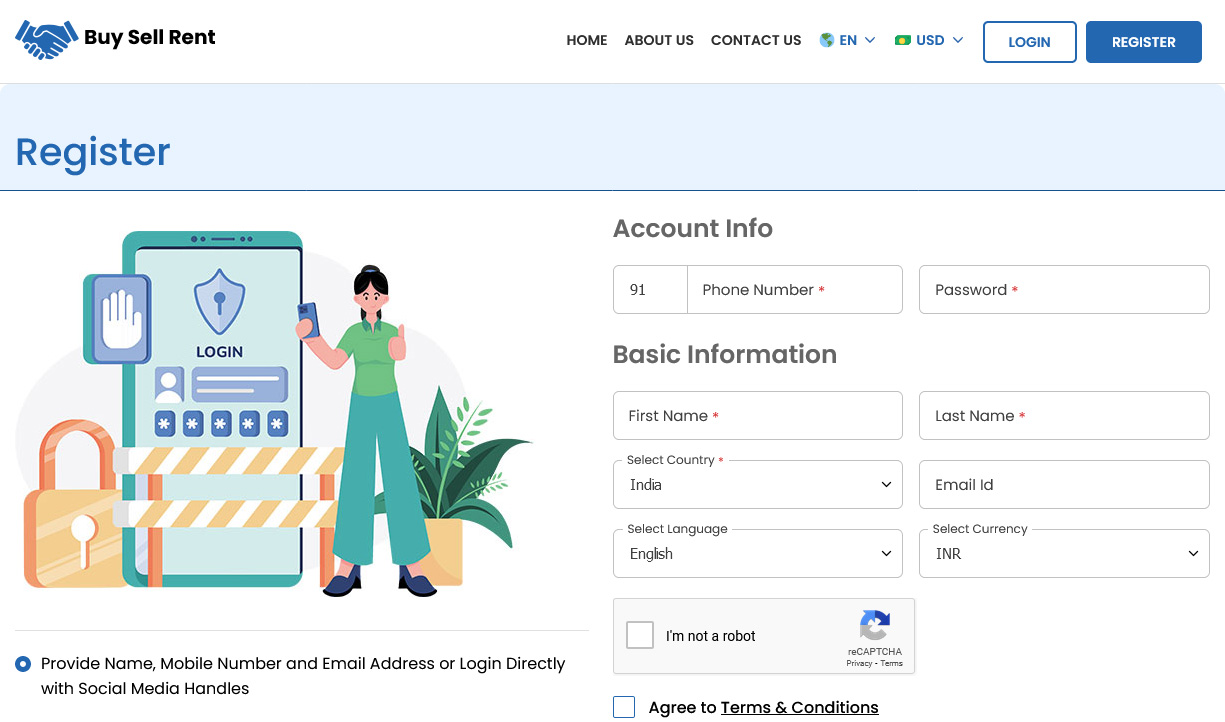
Website - Front End
Launch an intuitive website for your users, enabled with a contact us page, business information, an FAQ section, and so on. Keep scrolling sideways to get a glimpse of our website’s stunning interface.Manage Your Account
Our website incorporates stunning visuals, a navigable interface, and handy features like login/signup, transaction history page, language/currency selection options, etc. Scroll sideways through the screen to catch a glimpse of our website screens.Admin Panel
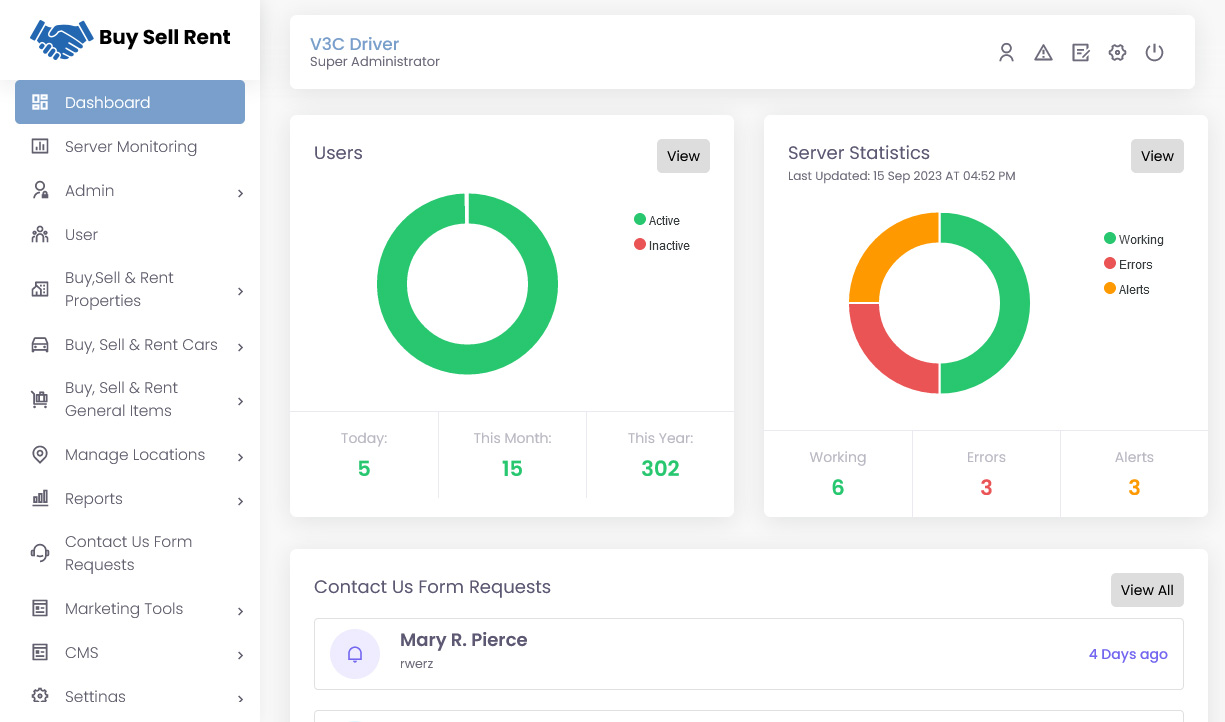
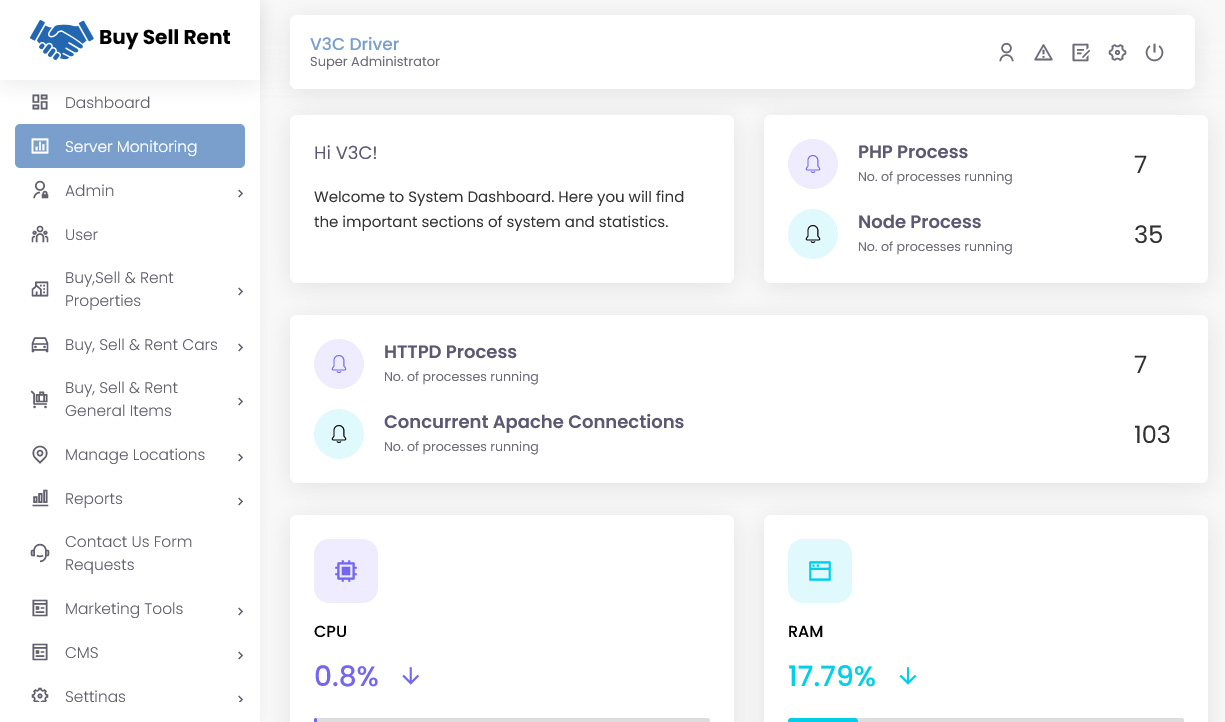
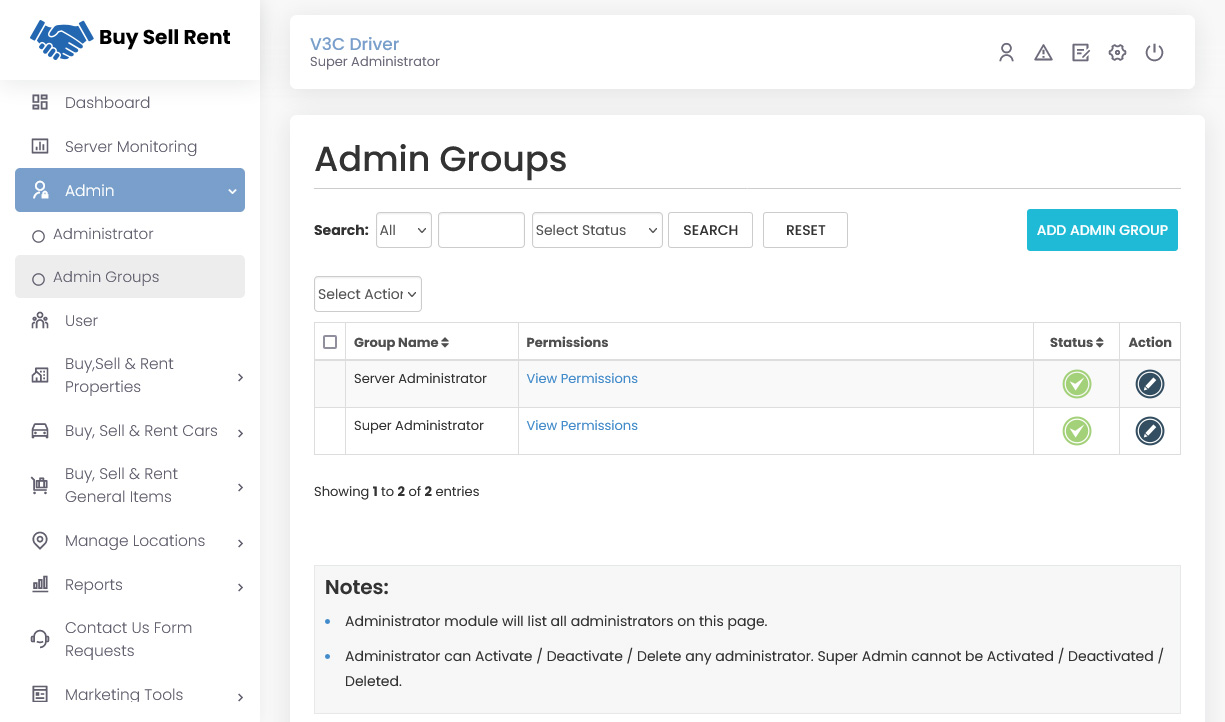
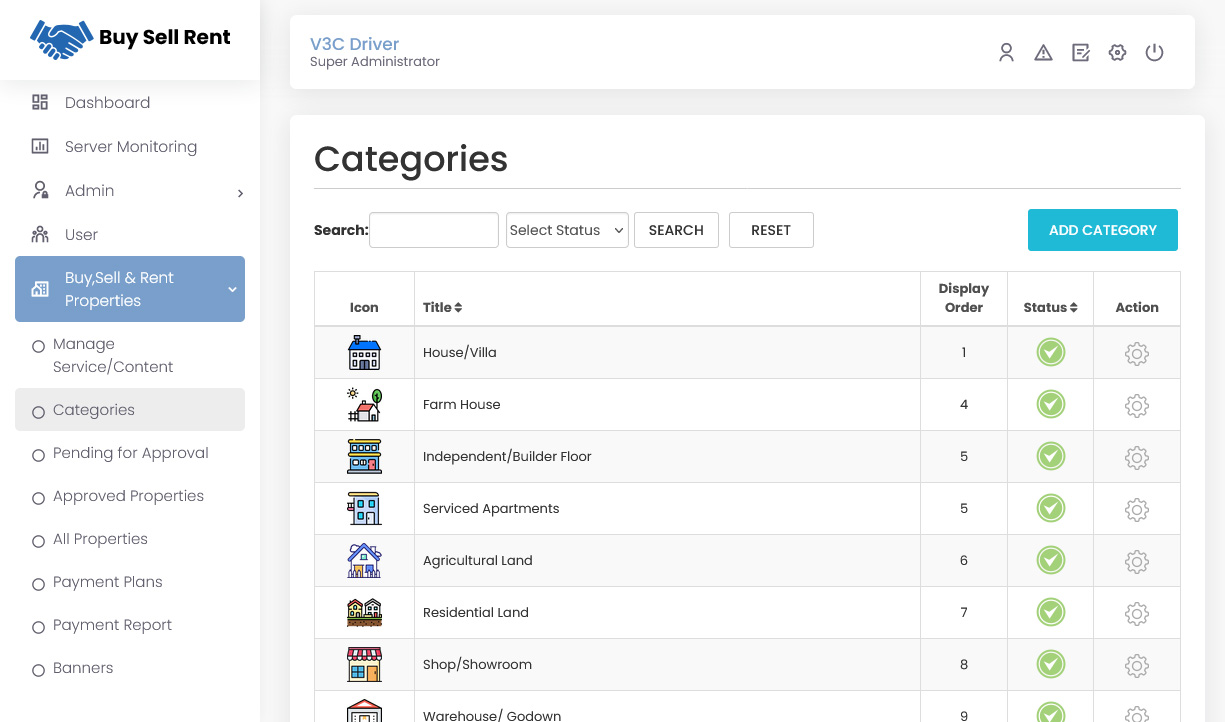
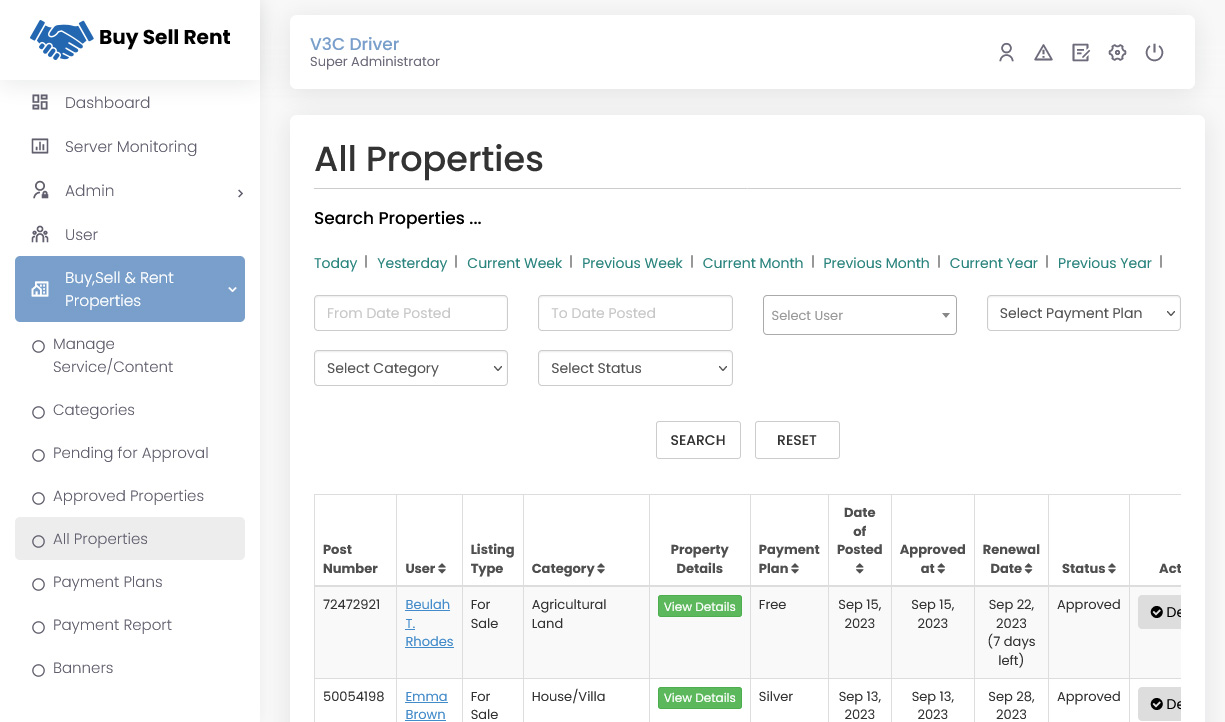
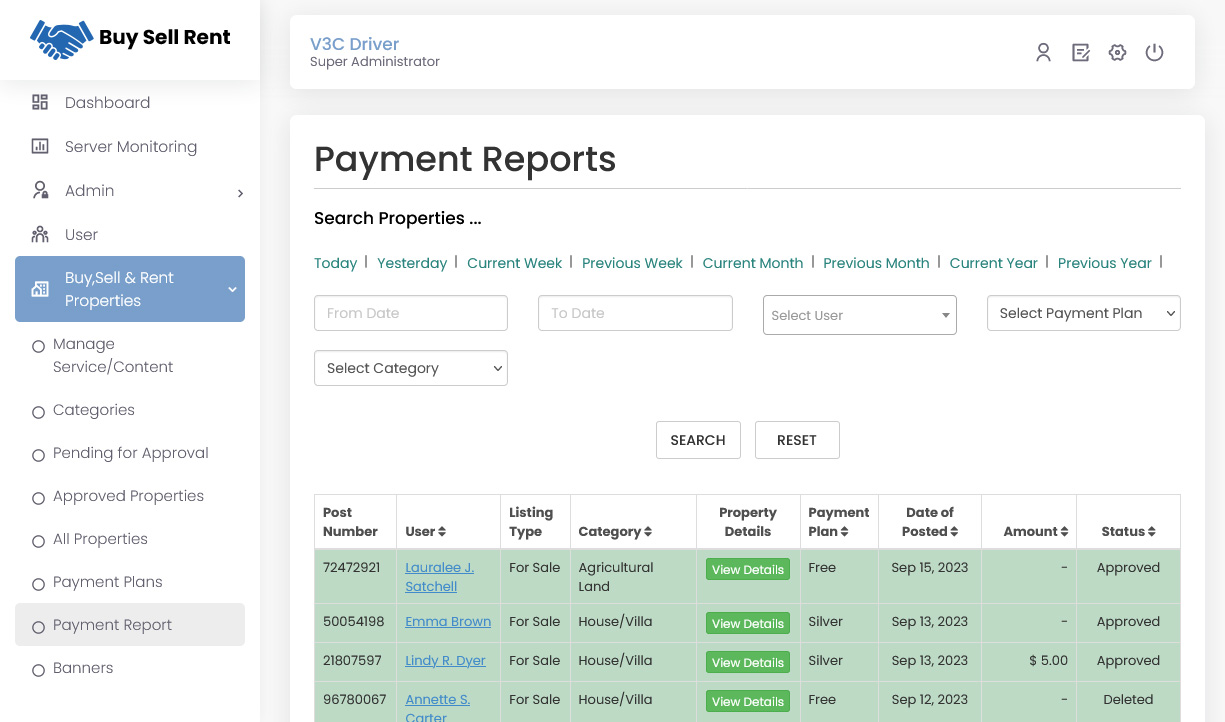
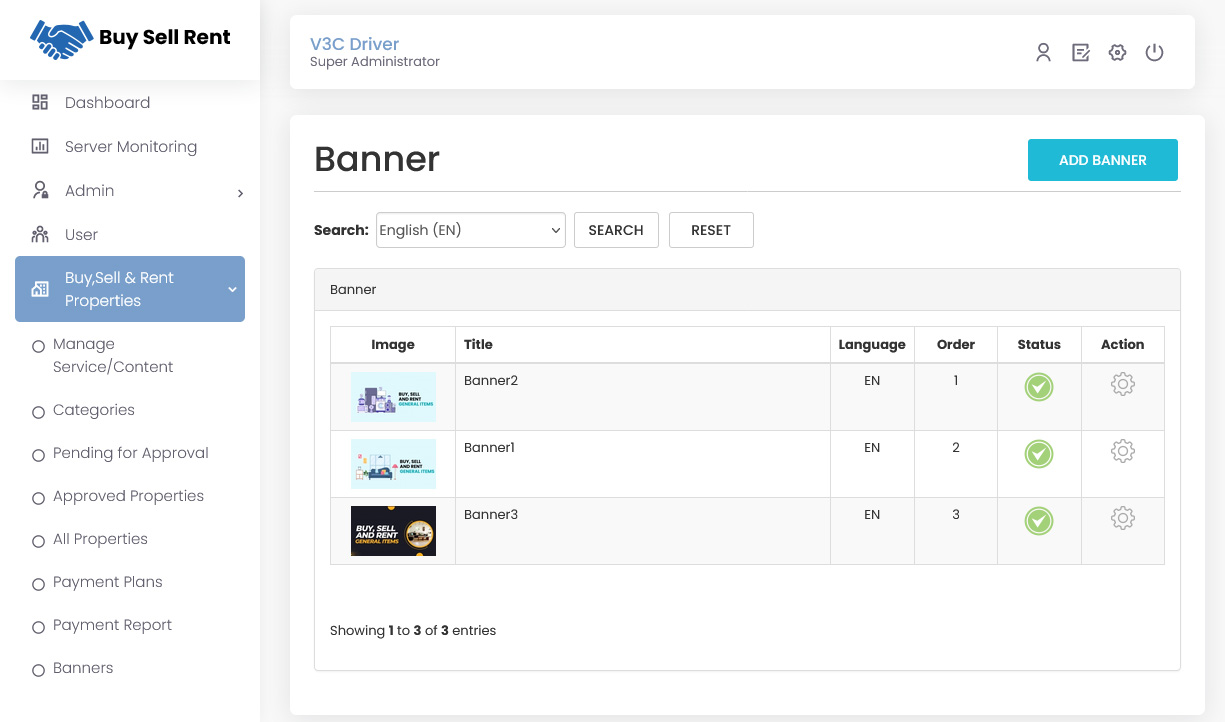
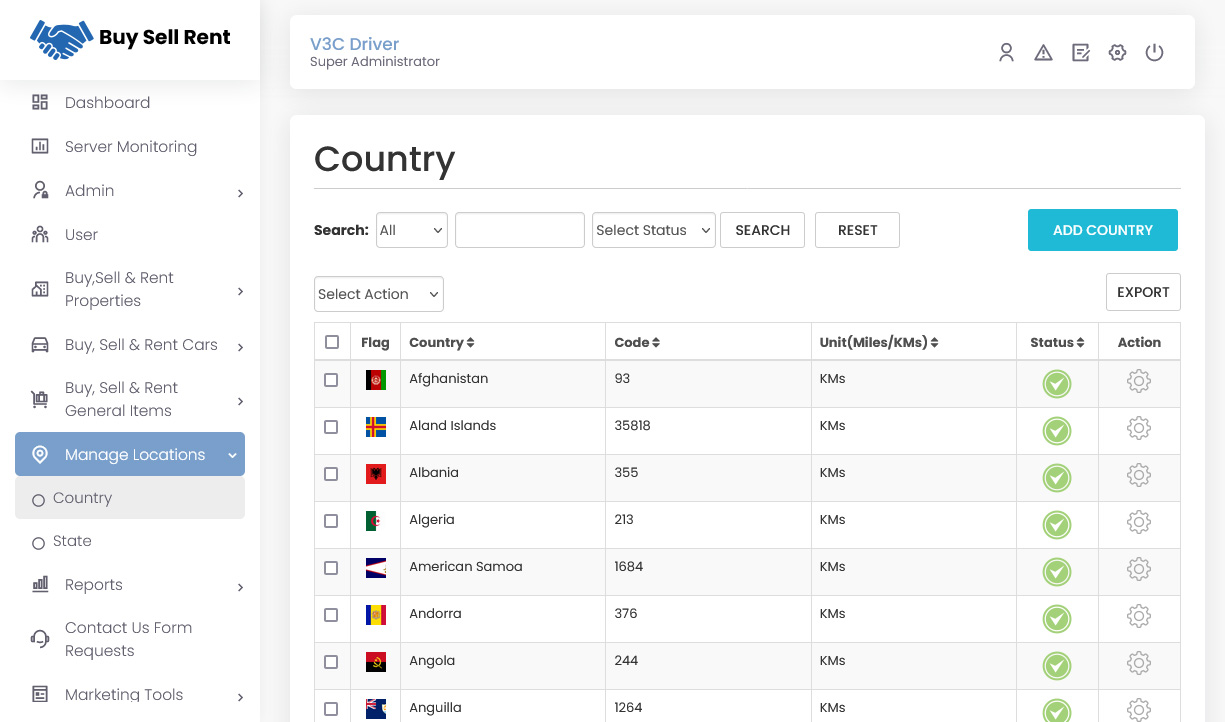
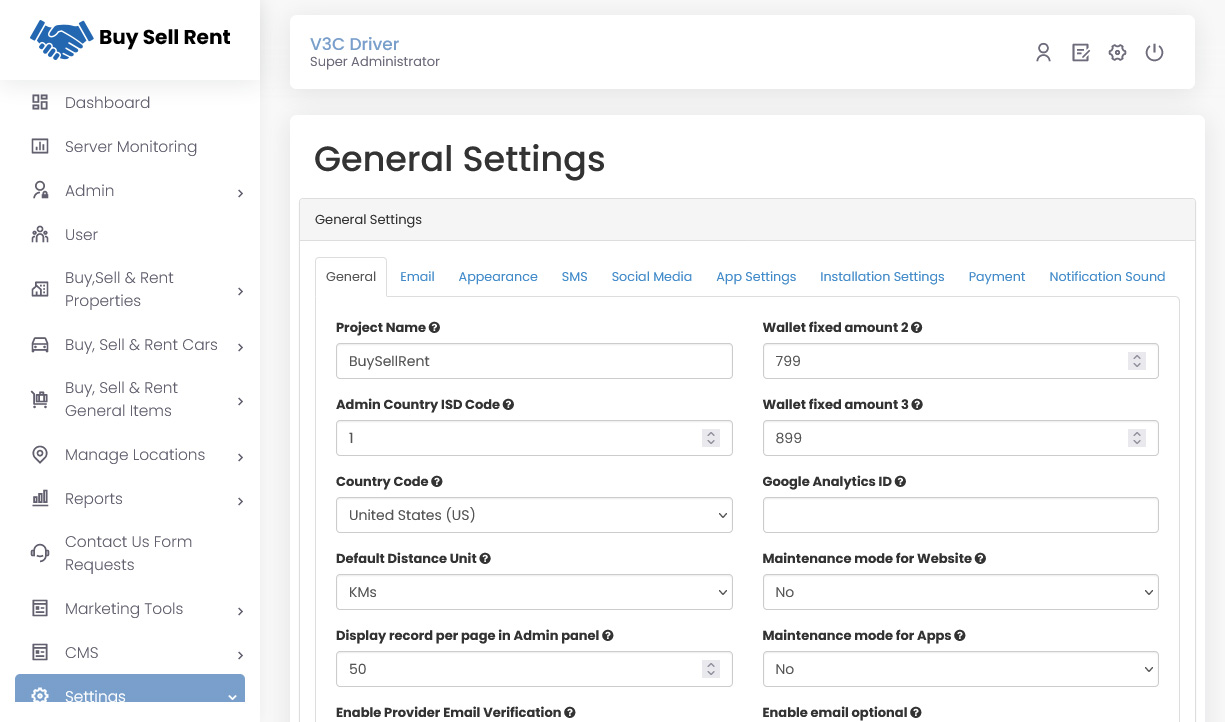
The ready-to-go Admin Panel is pre-integrated with convenient business management features, including admin management, server monitoring, user profile management, etc. You can also manage locations, access reports, view contact requests, and much more.Step by Step Graphical Flow
Loading Screen

Introduction Screen

Application Login
Touch Id / Face ID Login (For Android Phone Users)
Face Id Detection (For iPhone Users)
Registration
User Profile
Component 1: Buy, Sell & Rent Real Estate

Component 1 - BUY, SELL & Rent REAL ESTATE - NEW LISTING


Component 2: Buy, Sell & Rent Cars


Component 2 - BUY, SELL & Rent Car - NEW LISTING


Component 3: Buy, Sell & Rent General Items


Component 3 - Buy, Sell & Rent General Items - New Listing

Other Features
Send Gift Card
Receiver's End - Gift Card Details


Redeem Gift Card

Manage Notification Sounds and Ringtones
Using this unique feature, you the owner of this expensive Buy Sell Rent App can manage the notification sounds and respective ringtones.
All these sounds are already present in the System itself. However, other sounds may be downloaded from the Admin Panel.
Wallet integration
Multiple credit card management
Wallet to Wallet Money Transfer
Location Wise Push Notifications throughout the System
Notifications
Using Firebase for Mobile Number Verification and email verification


Other Information Screens

Advertisement Banners
Edit Profile
Language
Currency
Facebook & Google Ads integration


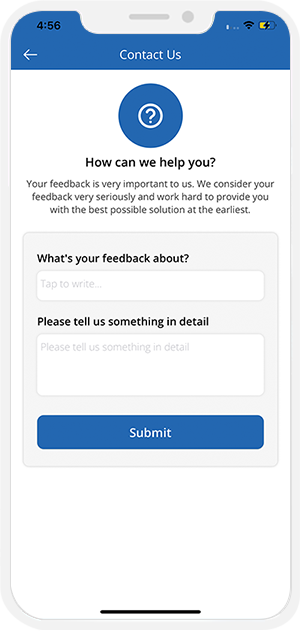
Contact Us & Help